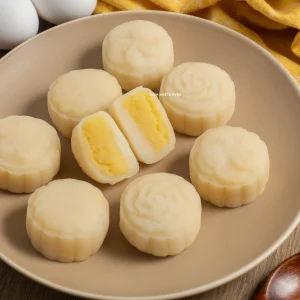
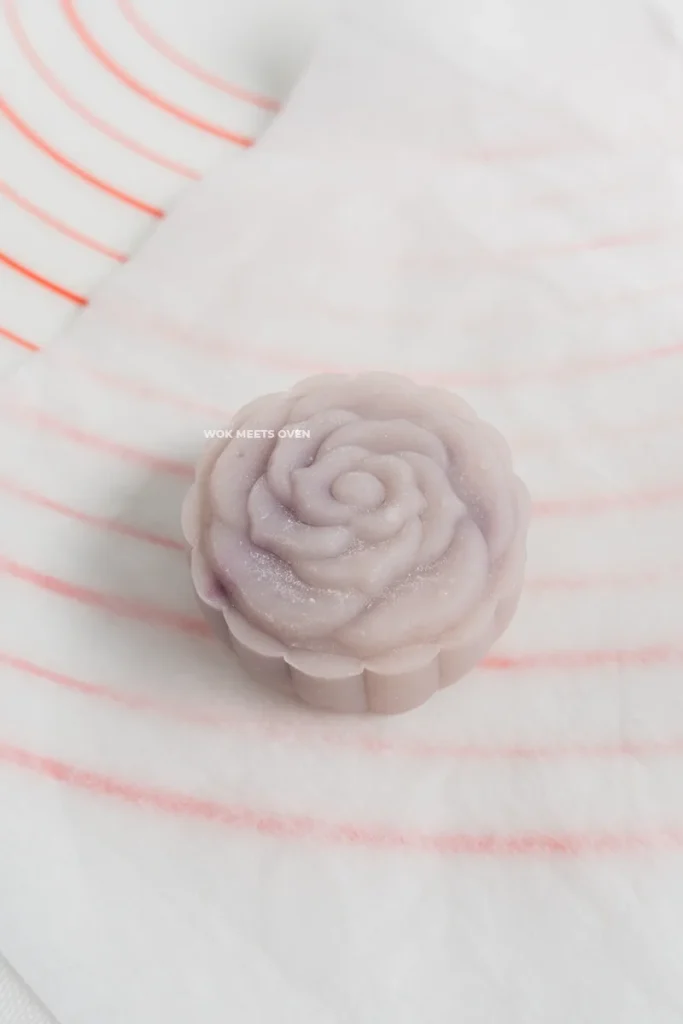
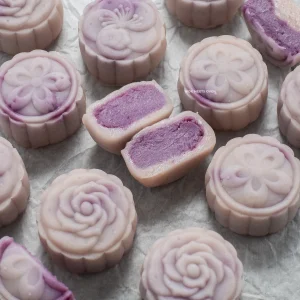
Purple Sweet Potato Snow Skin Mooncakes
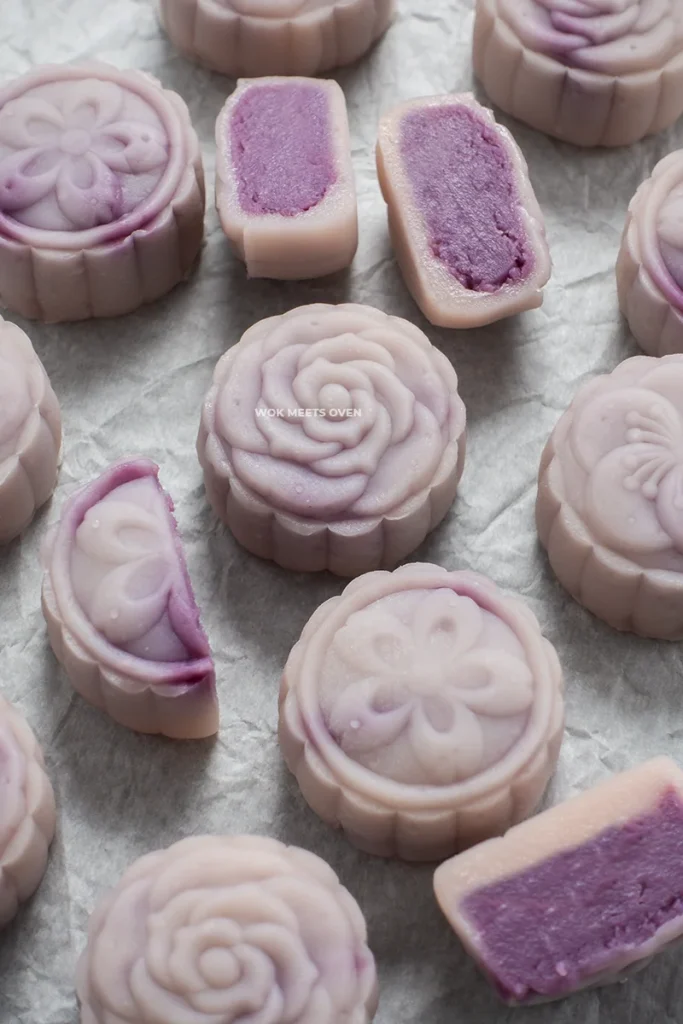
Soft, luscious, and creamy, this purple sweet potato snow skin moon cake is perfect for celebrating the Mid-Autumn festival with family and friends. The snow skin is soft and chewy, while the purple sweet potato filling just melts in your mouth. This easy snow skin moon cake with purple sweet potato recipe will soon become a family favorite in your household.

What Are Purple Sweet Potato Snow Skin Mooncakes?
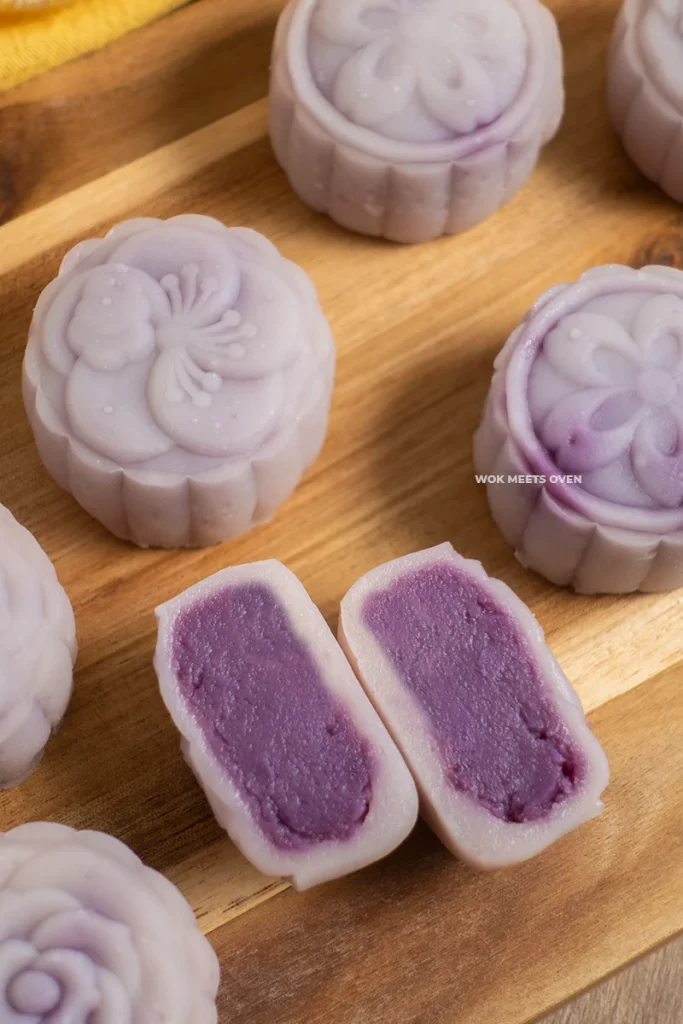
Purple sweet potato snow skin mooncakes, also known as 紫薯冰皮月餅 in Cantonese, are a type of snow skin mooncake filled with a soft and delectable purple sweet potato filling.
Snow skin mooncakes are a type of non-baked mooncakes popularized in Hong Kong in the 1970s. The snow skin moon cakes are known for being extremely soft and chewy and having a similar texture to mochi. Unlike traditional moon cakes, you’ll typically see snow skin moon cakes with a wide assortment of different and unique toppings such as mung bean durian, taro, red bean, black sesame, and, of course, purple sweet potato.
A purple sweet potato snow skin mooncake is perfect for people who love purple sweet potato desserts, as the snow skin mooncakes are loaded with purple sweet potato.
This purple sweet potato snow skin mooncakes recipe is beginner-friendly and much easier to make, not to mention less time-consuming as well, compared to traditional baked mooncakes.
The process for making snow skin mooncakes involves basically 3 steps:
- Making the filling
- Making the snow skin dough
- Assembling the mooncakes
Let’s now discuss some of the important and unique ingredients that you’ll need for this purple sweet potato snow skin mooncake recipe.
Ingredient Notes
Purple sweet potatoes: To get the dark purple color for the filling, make sure that the purple potatoes that you use are purple inside or will turn purple after you steam them. I made the mistake of buying some purple sweet potatoes that turned out to have a white center! Also, don’t confuse purple sweet potatoes with ube, they aren’t the same thing!
Rice flour: This gives structure to the mooncakes and is less sticky compared to glutinous rice flour. Make sure you’re using rice flour and not glutinous rice flour here. The package will usually be in a clear red package, but not always!
Glutinous rice flour: This makes our snow skin mooncakes soft, chewy, and sticky. This is widely available at all Asian grocery stores, and I even found some being sold at local grocery stores like Walmart as well.
Wheat starch: Gives our snow skin mooncakes a somewhat translucent appearance. Again, available at all Asian grocery stores. Do not confuse this with regular wheat flour; it’s different!
Coconut cream: Make sure that you’re using coconut cream and not coconut milk! Coconut milk is very runny and will make your snow skin dough very sticky. It should say coconut cream on the can.
Substitutions
- Vegetable oil: You can opt to use coconut oil instead to have more of that coconut scent. You can also use other unflavored cooking oils as well such as canola or even unsalted melted butter.
- Icing sugar: You can substitute it with some white granulated sugar.
- Purple sweet potatoes: You can substitute the purple sweet potatoes with either regular sweet potatoes or some ube if you can find them.
How to Make Purple Sweet Potato Snow Skin Mooncakes
Making the Filling
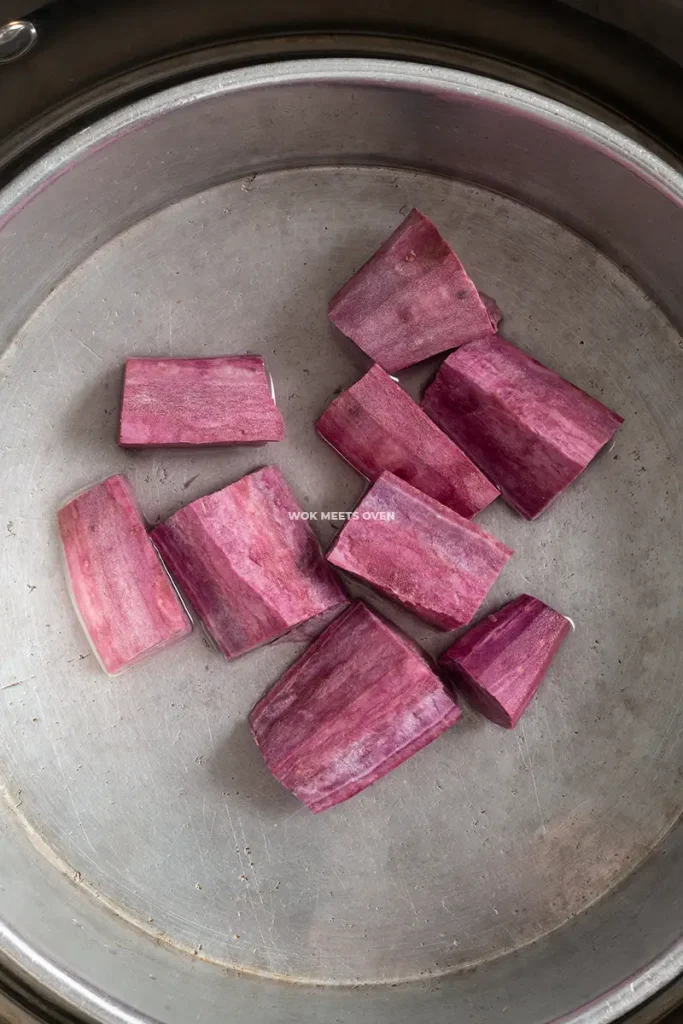
- Wash and remove the skin from the purple sweet potatoes.
- Cut them into bite-sized pieces and place them into a bowl or plate.
- Add 100ml of water to the purple sweet potatoes and steam them for 11-12 minutes at medium-high heat after the water is boiling. After 11-12 minutes, check and see if they are done by using either a fork or a chopstick and poke the sweet potatoes. You should be able to easily poke a hole through them without much resistance. If they are still hard, then continue steaming them until soft.
- After steaming the sweet potatoes, strain out the liquid but keep the liquid (do not throw it away!). We will use this as a natural food coloring to add a light purplish color to our snow skin dough.

- Place the steamed sweet potatoes inside a blender or food processor. Add in your water, condensed milk, wheat starch, salt, coconut cream, and cooking oil.
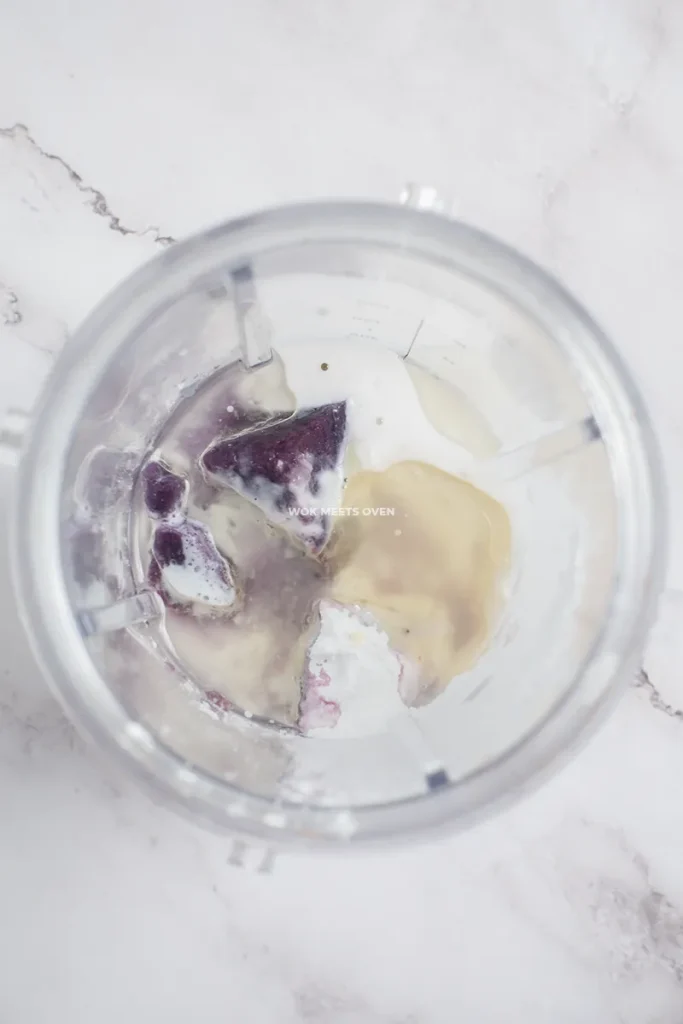
- Blend everything together until smooth.

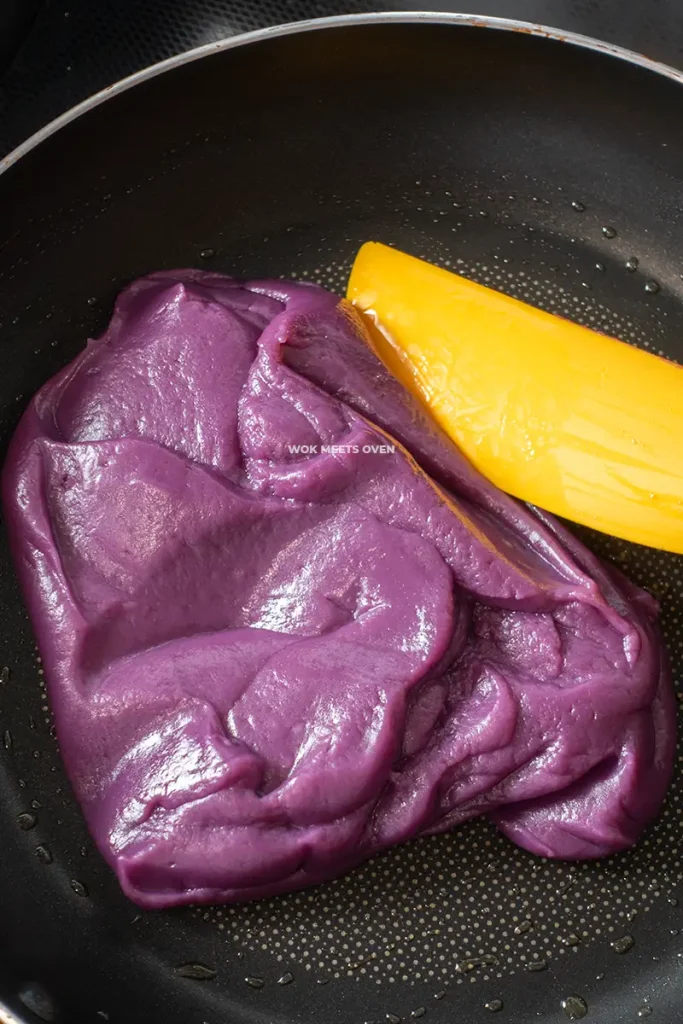
- Now, transfer the filling to a non-stick pan. Cook it on medium heat until you start to see it solidify, then reduce the heat to medium-low and continue cooking.

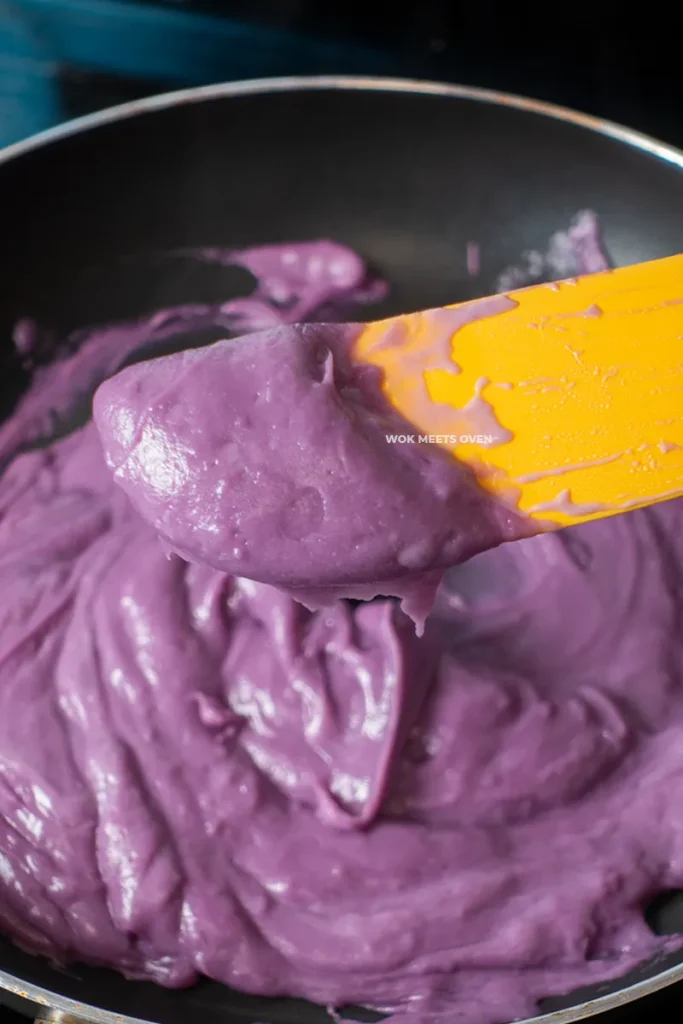
- Once the filling no longer sticks to the pan or your spatula and has formed into one big piece, remove it from the pan and transfer it to a bowl.
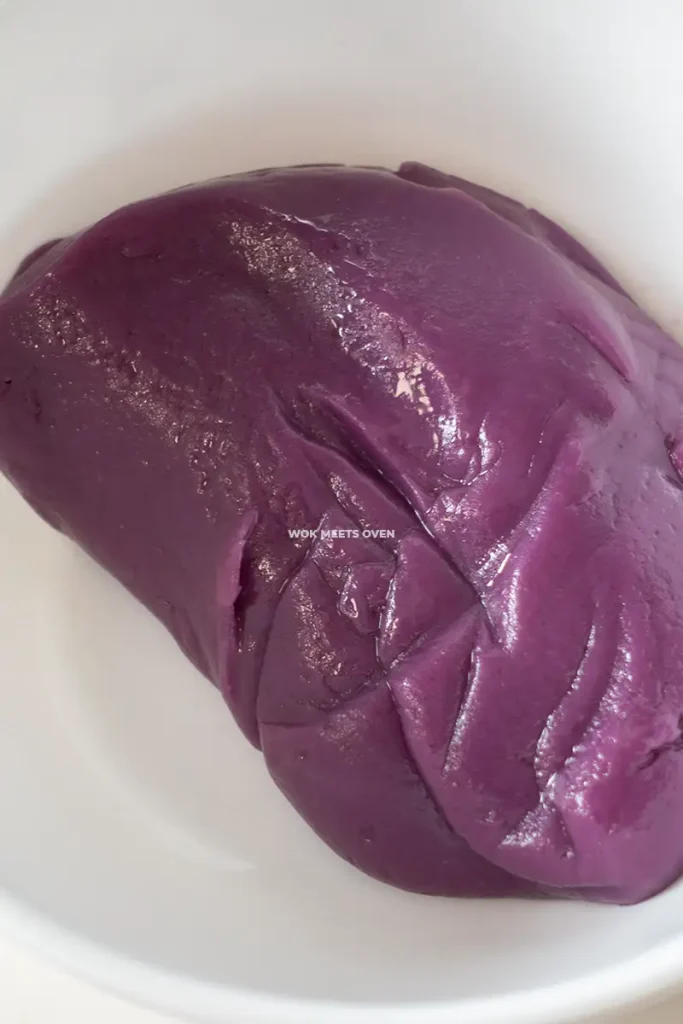
- Let it cool down, then cover it with plastic wrap and place it in the fridge to cool down.
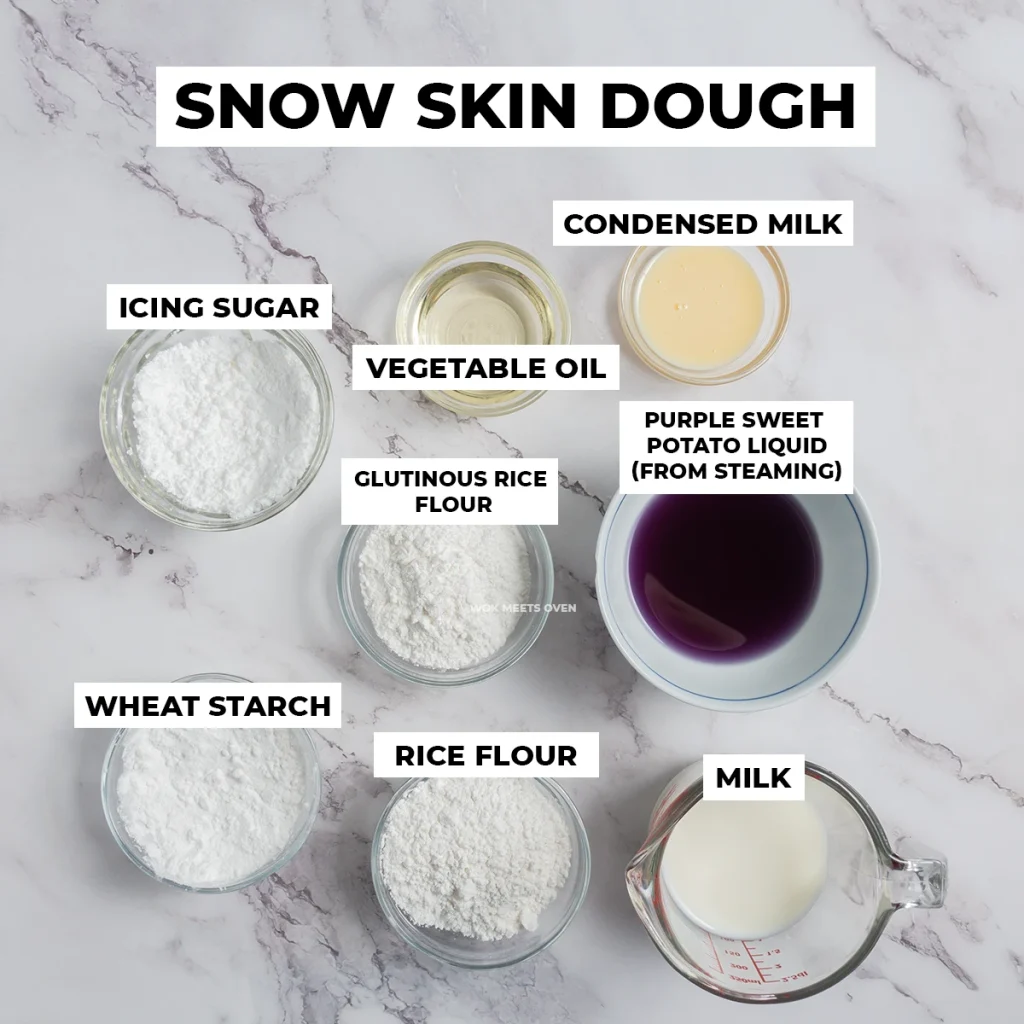
Making the Snow Skin
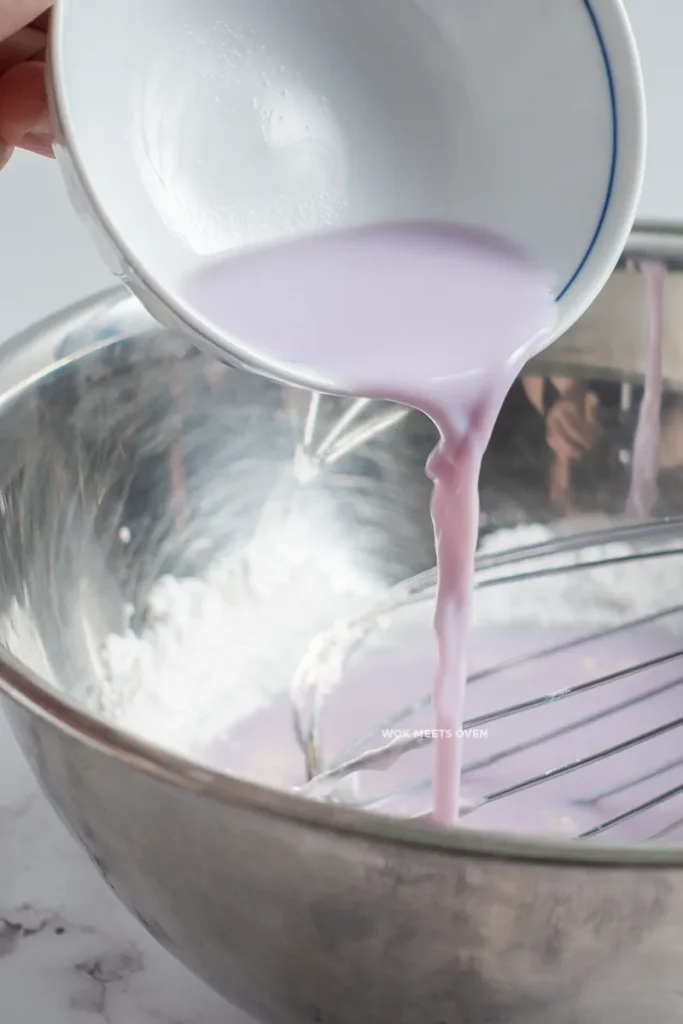
- In a large bowl, add in your rice flour, glutinous rice flour, wheat starch, icing sugar, and condensed milk. Give a quick whisk.
- Now using a scale, pour out the purple liquid from the sweet potatoes into a bowl and measure out how much liquid you have.
- Next, add milk to the purple liquid until the total weight reaches 130ml.
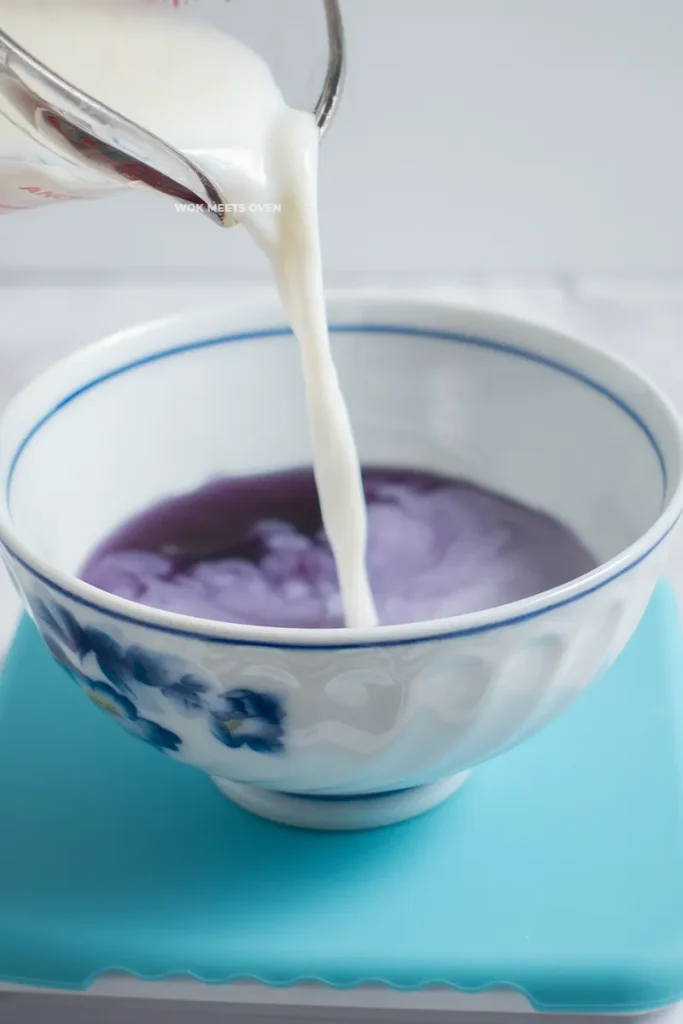
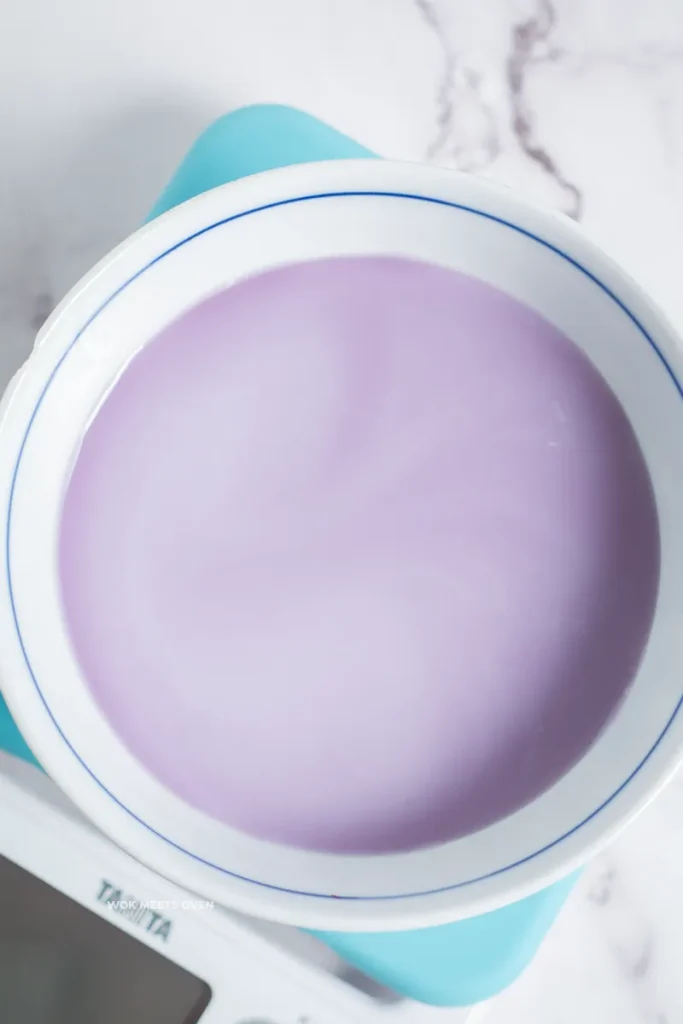
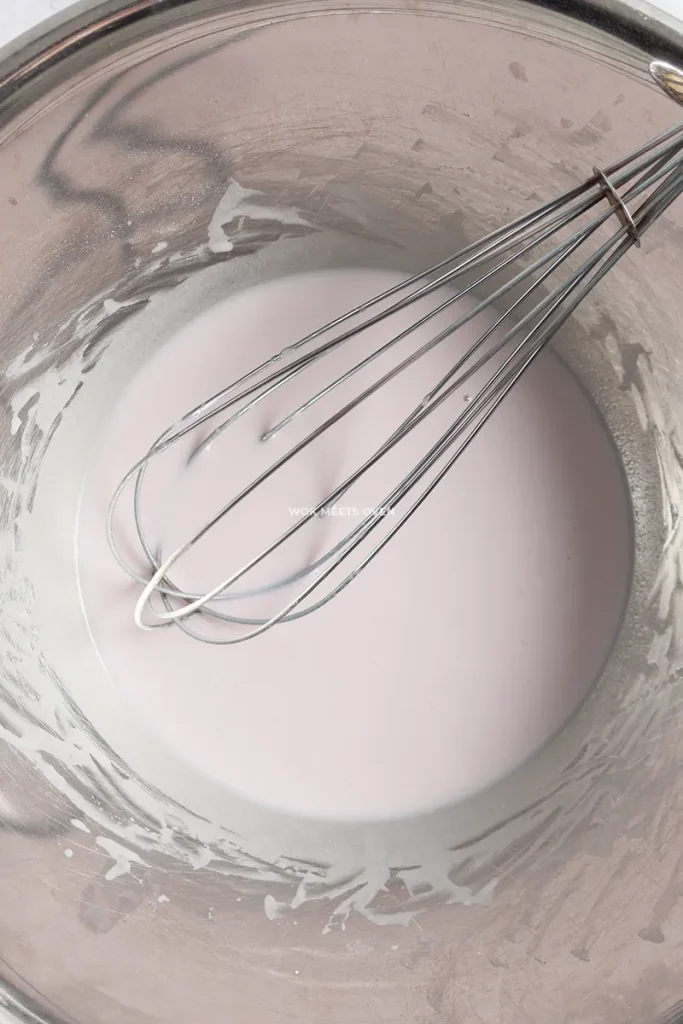
- Pour this liquid mixture into the large bowl with the other ingredients. Mix everything well together using a whisk.
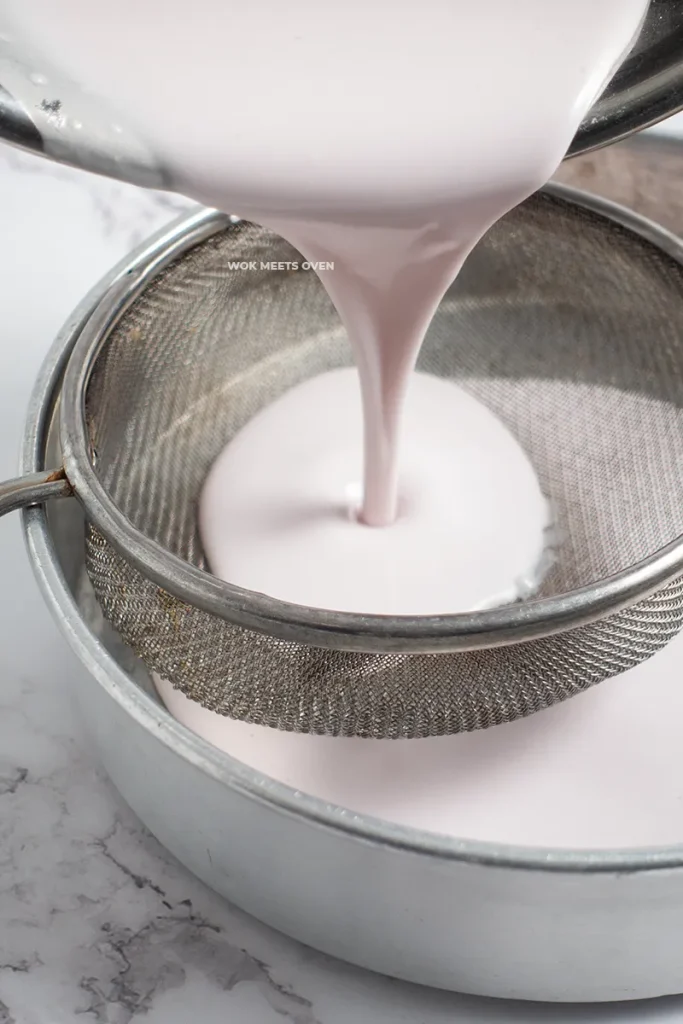
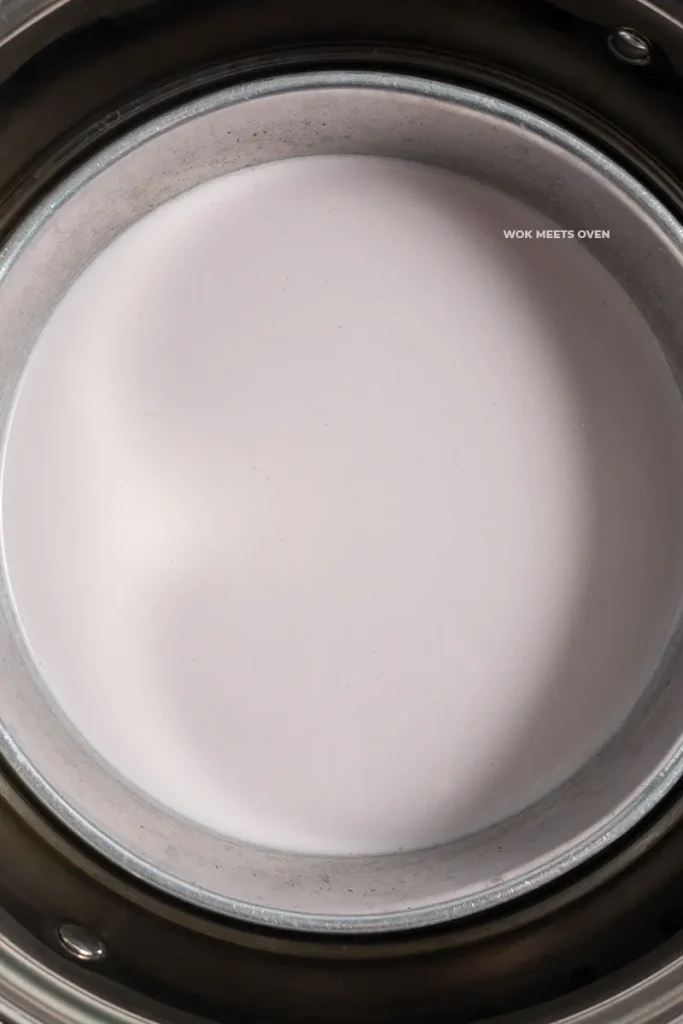
- Now pour the mixture through a sift onto a pan for steaming. Steam the mixture on medium-high heat for 25 minutes.
- Once done, remove it from the steamer and pour in your cooking oil.

- Now make some cuts to the steamed snowskin and then remove it from the bowl/plate and transfer it to a large mixing bowl.
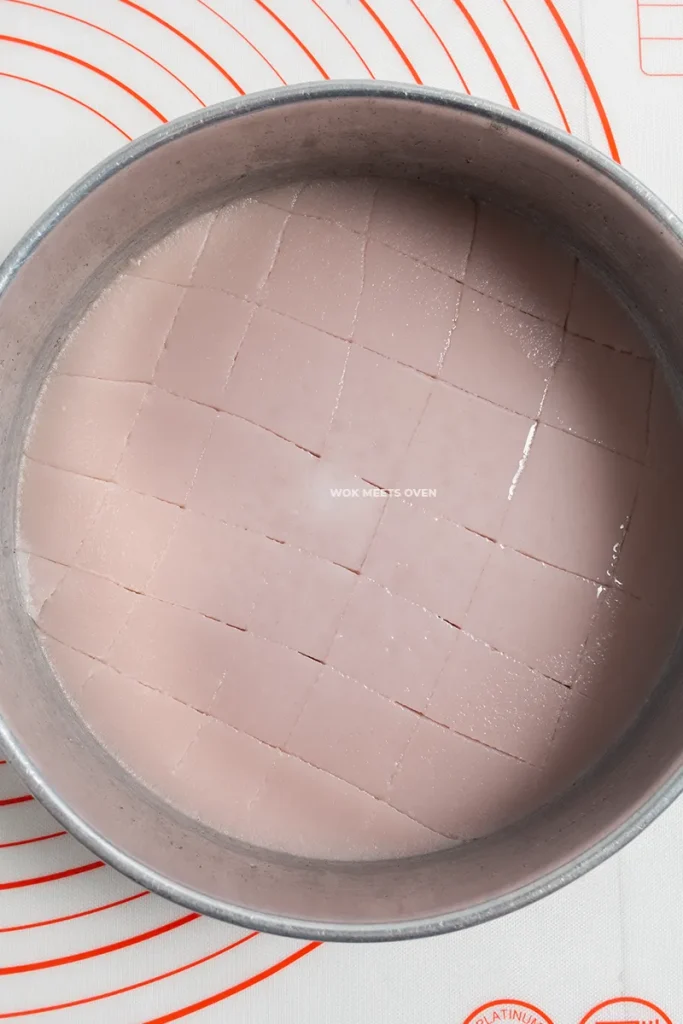
- Allow the snowskin to cool down for 2-3 minutes before kneading the dough. Knead the dough until it is nice and smooth and all of the oil has been absorbed into the snow skin. Shape it into a ball and cover it with some plastic wrap, and let it rest.

Cooking Glutinous Rice Flour
- Add glutinous rice flour to a saucepan or non-stick pan.
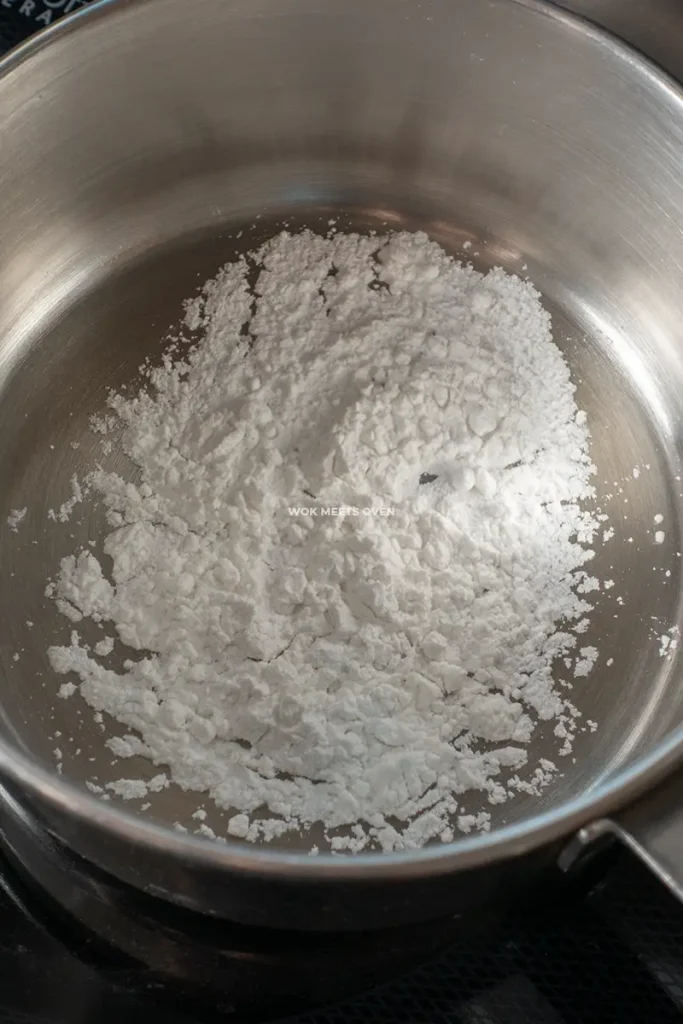
- Stir-fry it on low heat for about 5 minutes or until the color turns into a light beige color, and you can smell an aroma coming from the cooked glutinous rice flour.
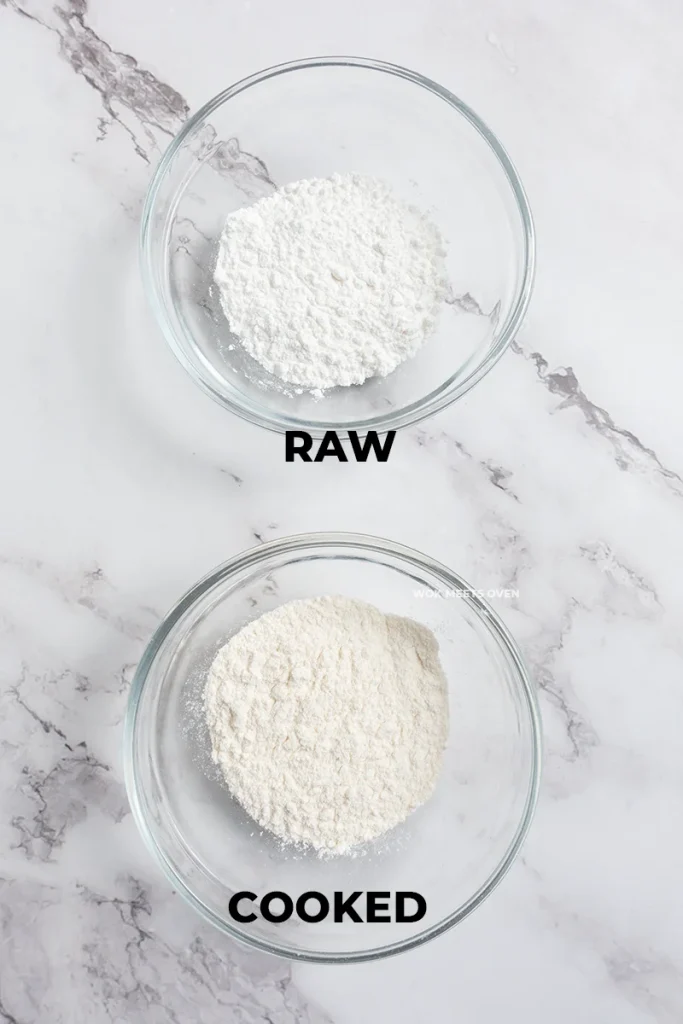
- Remove it from the heat and transfer it to a bowl for dusting the mooncakes later.
Assembling the Snow Skin Mooncakes
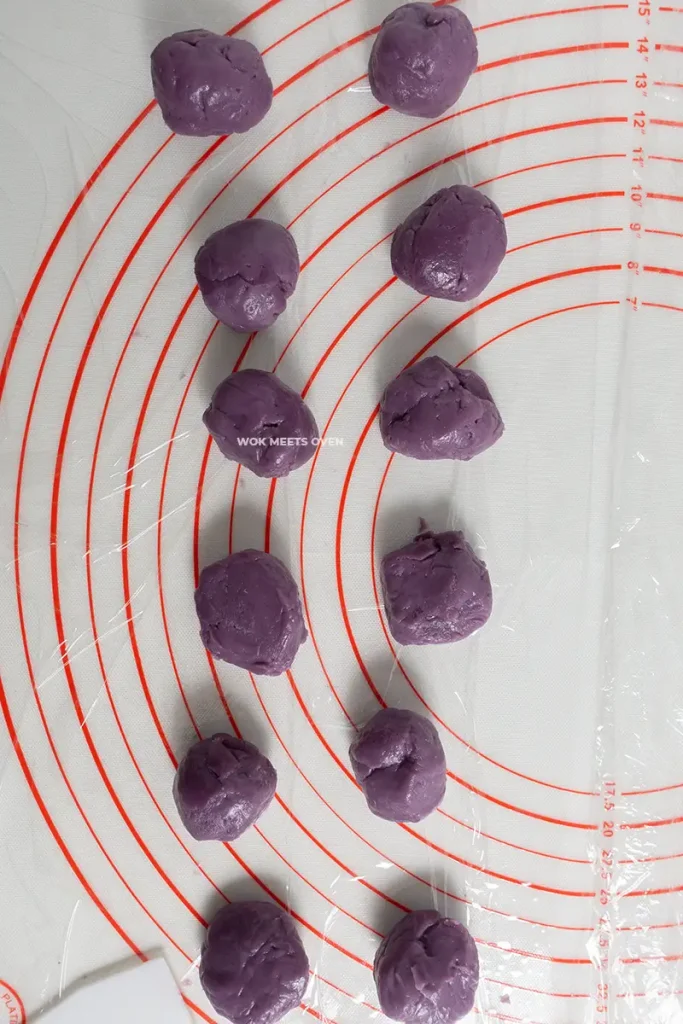
- Now take out the filling from the fridge and weigh it out.
- Then divide it into 12 pieces (it should be approximately 25g per piece). Do not use more than 25-26g per piece, as it will not fit the mold! If you have any excess, then either make an extra piece with it or consume the extra filling as is.
- Next, roll the filling into balls and then cover them with plastic wrap and place them back in the fridge.
- Now weigh out the snow skin dough and then divide it into 12 pieces. Again, they should be approximately 25g per piece.
- Roll out each piece into a ball and then cover it with plastic wrap.

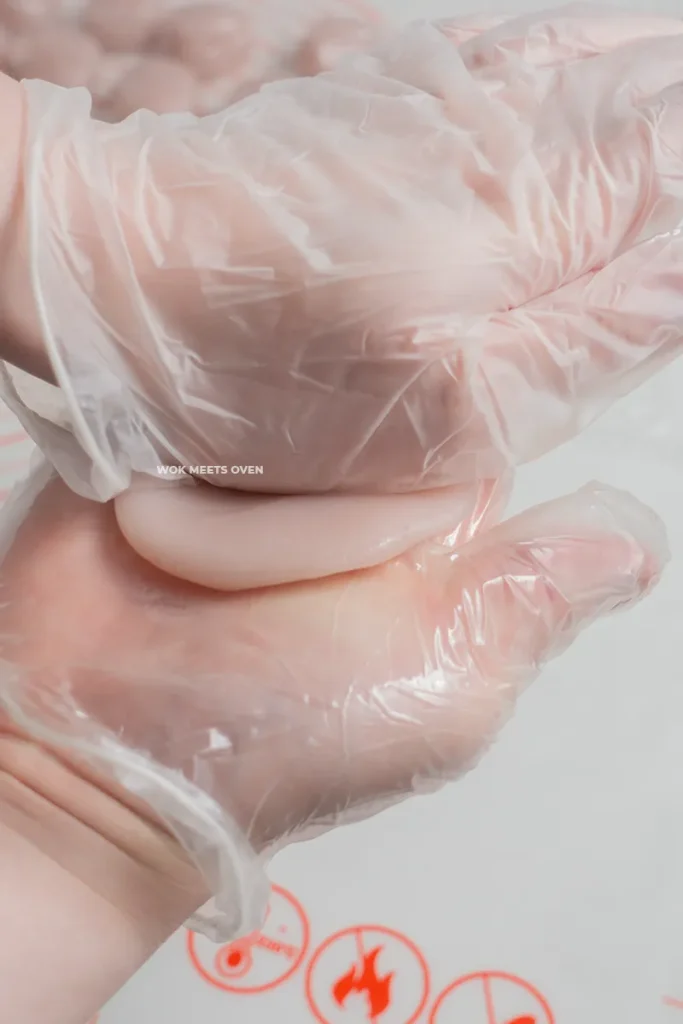
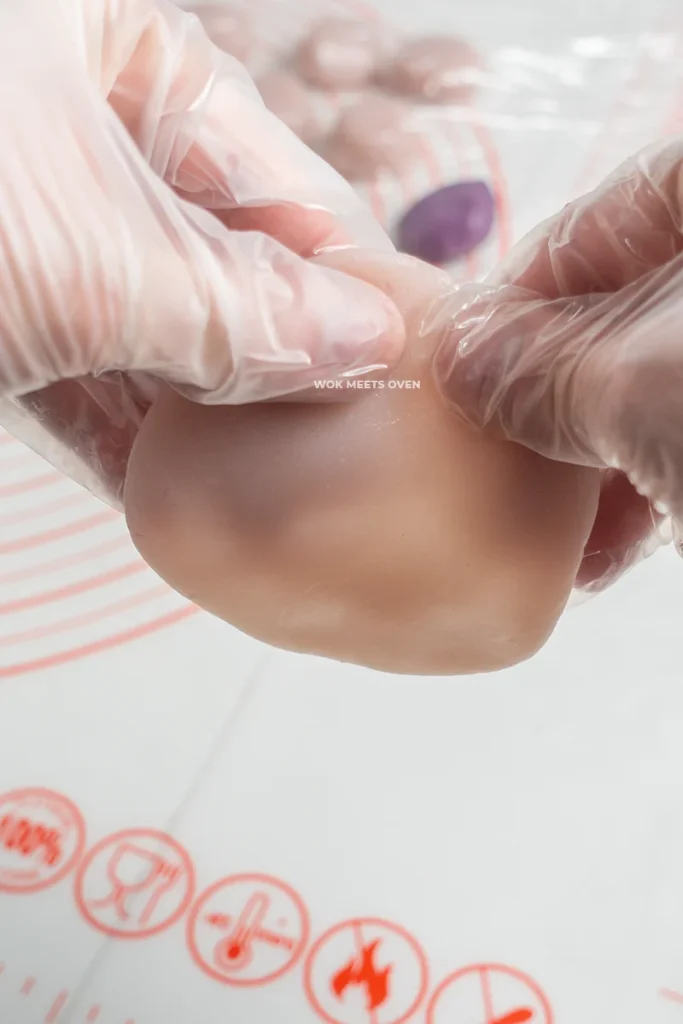
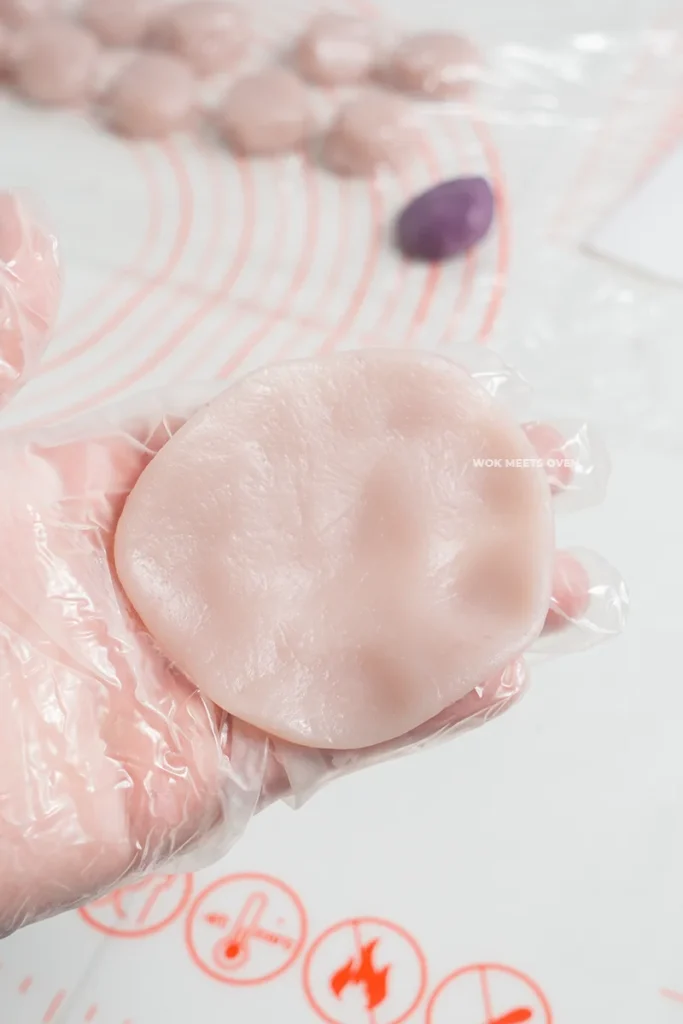
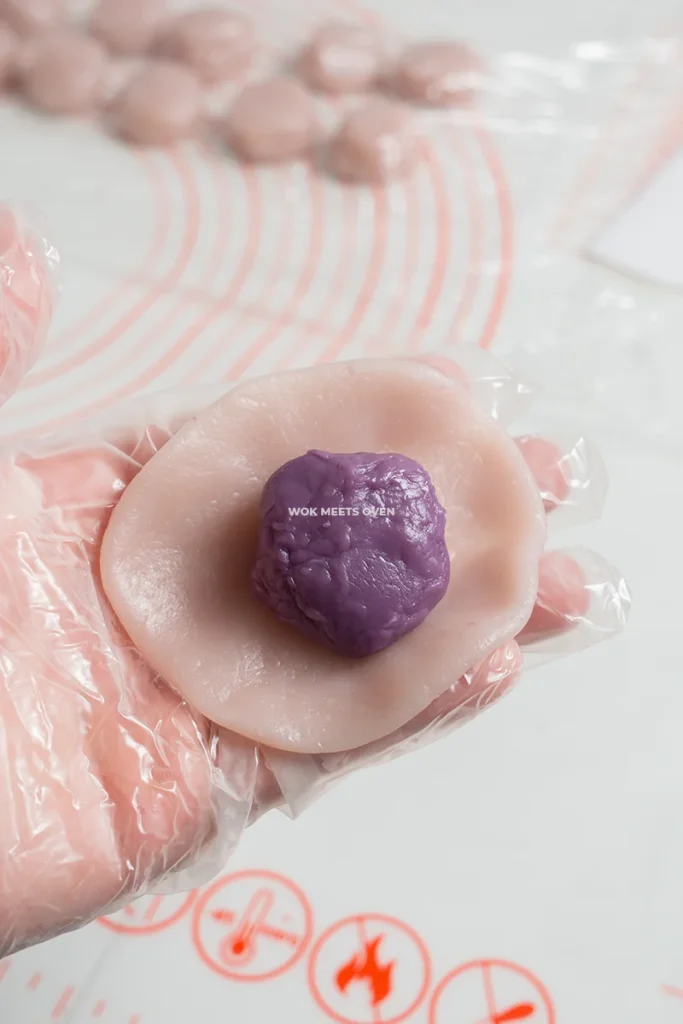
- Now grab 1 piece of the snowskin and flatten it out into a circle until it is about the size of your palm or about an inch away from the filling when it is placed in the center of the snow skin. You can do this easily by using the palm of your opposite hand and pressing down onto the snow skin and then gently stretching it out with your thumb and index fingers while rotating it with both hands.
- Now grab one piece of your filling and place it in the center of the snow skin dough.
- Then, using your thumb and index finger, hold the filling with one hand and flip it over.
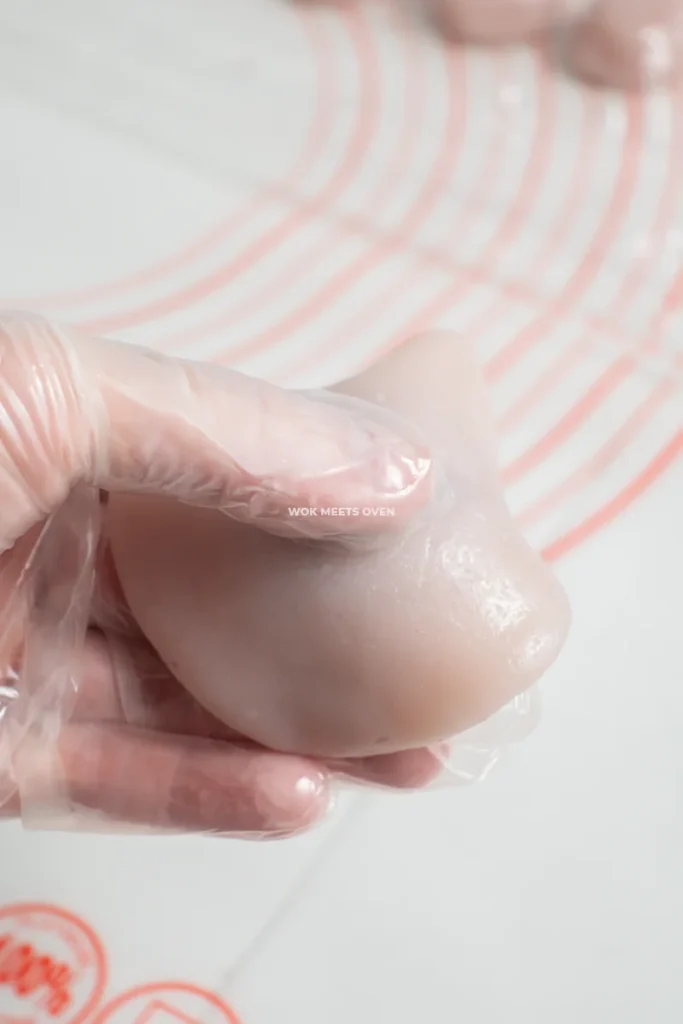
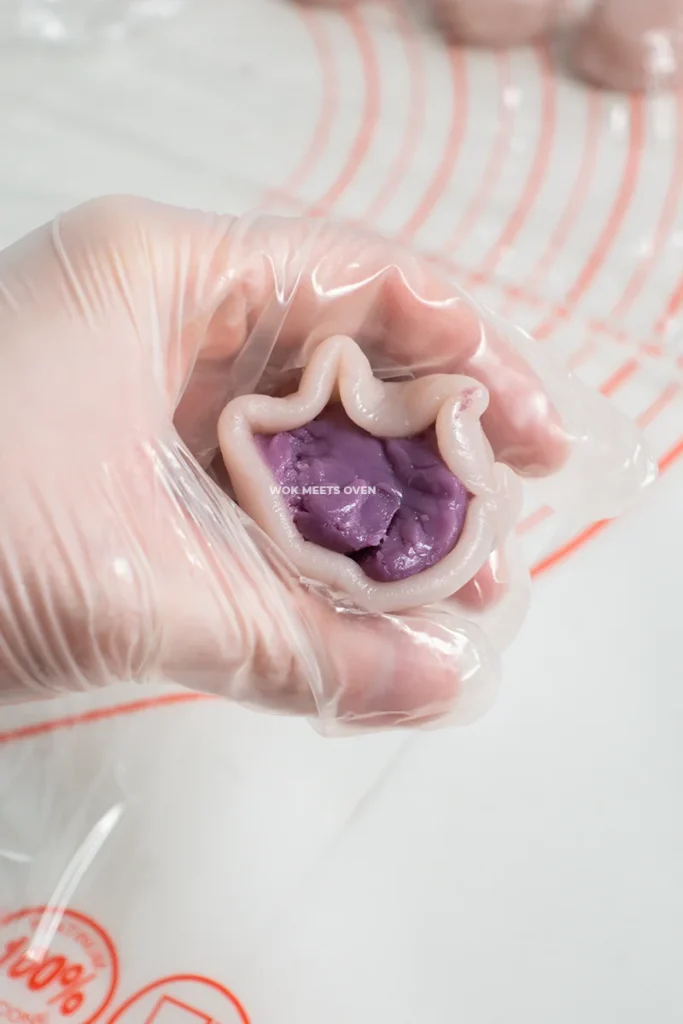
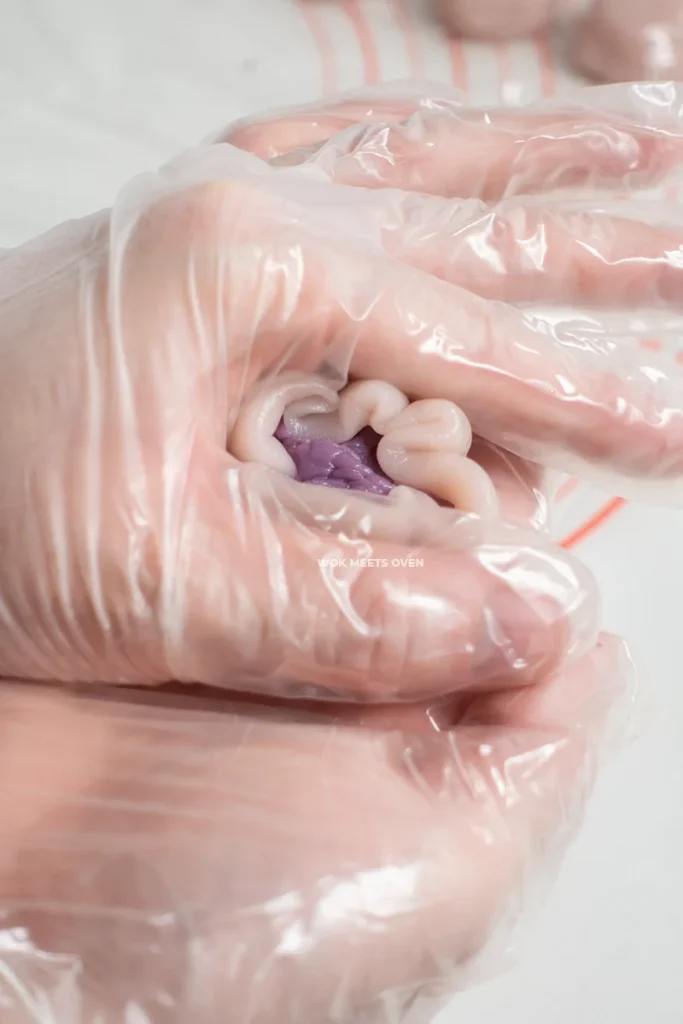
- Now, using your other hand wrap your hand around the sides of the dough and slowly bring the sides toward the center on all sides, making sure not to allow any air pockets to develop.
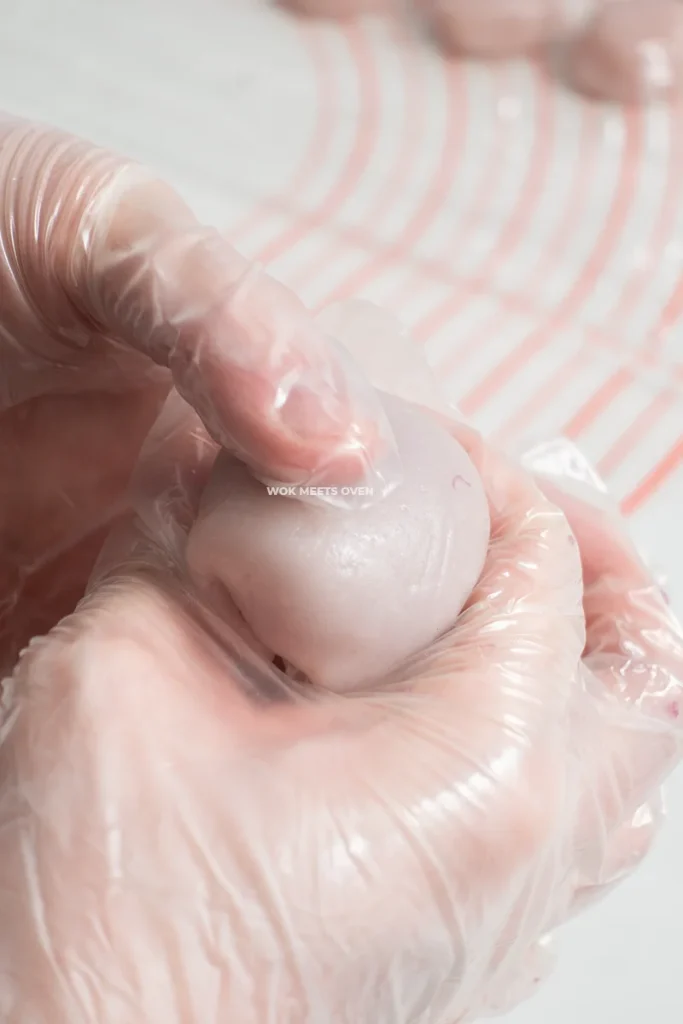
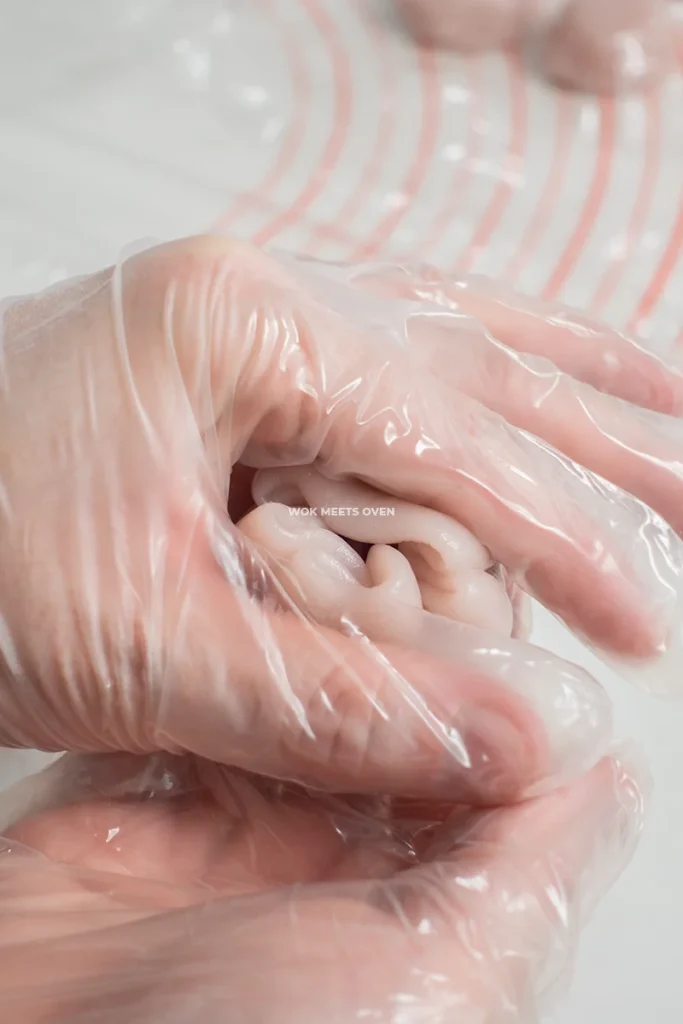
- Next, flip it over again, and then using your thumb and index finger on one hand with the other hand holding it while rotating, slowly push the snow skin towards the center at the top to cover up all of the filling.
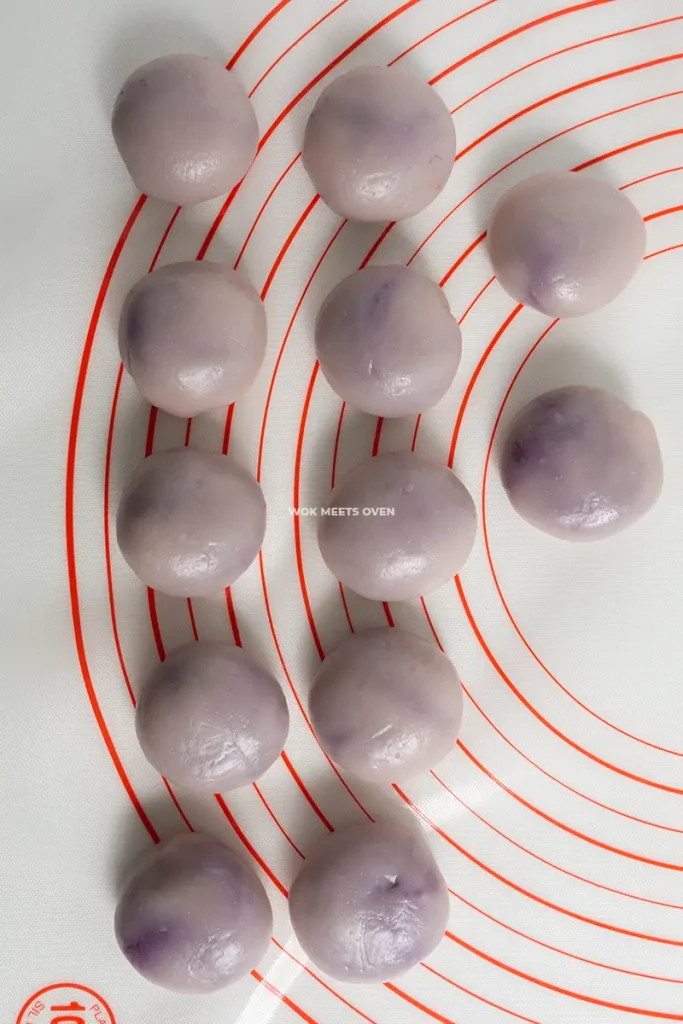
- Once all of the filling has been covered by the snow skin, seal the top by pinching it and then folding it back into the snow skin or ripping off the tip. Roll it out until it becomes smooth and resembles a ball, then cover it with plastic wrap.

- Repeat for all of the other pieces.
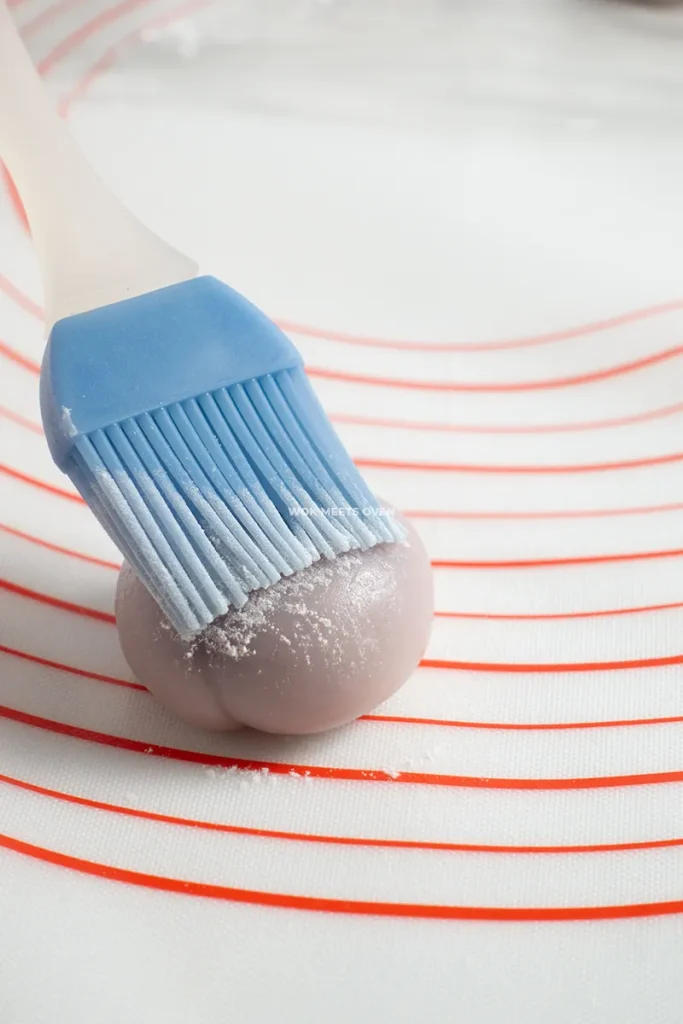
- Now grab a brush and then lightly brush the cooked glutinous flour onto the snow skin mooncake. Do not go overboard here; otherwise, the cooked glutinous rice flour will cover up all of your designs.
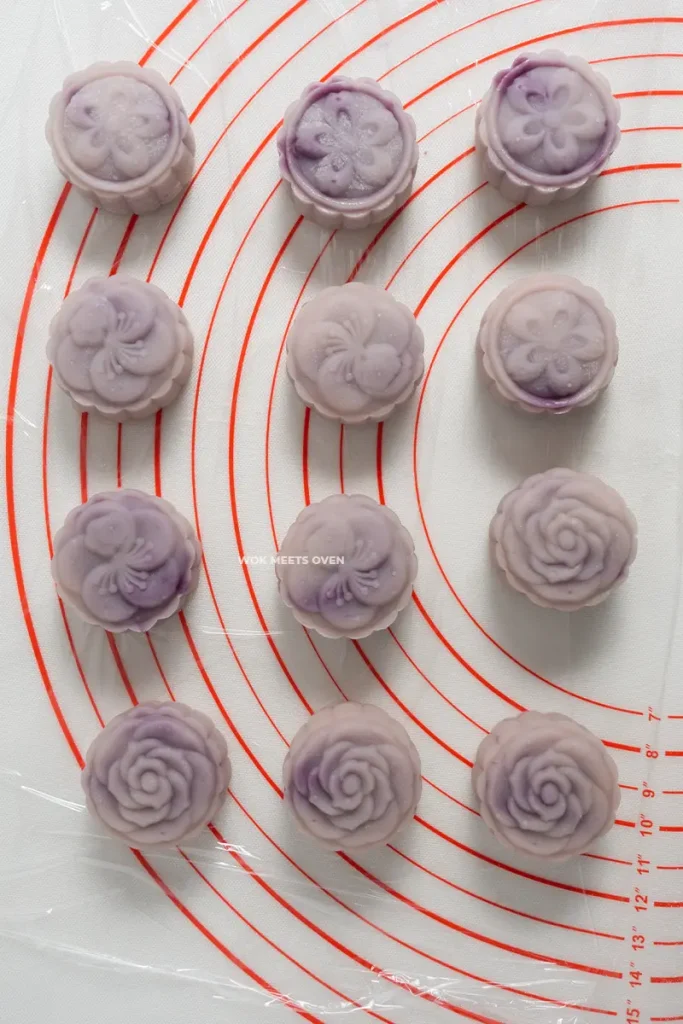
- Next, grab a 50g moon cake mold and place the moon cake inside the moon cake mold with the smooth side facing up. Make sure that the moon cake pieces can easily fit into the mold. If it doesn’t fit, do not force it in. Instead, gently shape it into a smaller piece by lightly pinching it while rotating it.
- Now, place a piece of parchment paper underneath the moon cake mold and then press down onto the moon cake mold with one hand while holding the mold with the other hand. Keep pressing down for about 12 seconds and then slowly release the mooncake from the mold. If the moon cake doesn’t come out, then gently press down another 1-2 more times while slightly lifting up the moon cake mold.
- Repeat for all of the other pieces.
- Once done, place all of the snow skin mooncakes in a container with a lid in the fridge and chill them for a minimum of 2 hours before eating.
A Few Helpful Tips
Common Mistakes Beginners Make
- Not using a non-stick pan to cook the filling. The filling will get stuck onto the pan while cooking.
- Cooking the filling on high heat. The filling needs to be cooked on medium and medium-low heat otherwise it will get overcooked and become dry.
- Not cooking the filling long enough leading to a runny overly sticky filling. The filling should form into a large paste that doesn’t stick to your spatula nor the pan once it’s ready.
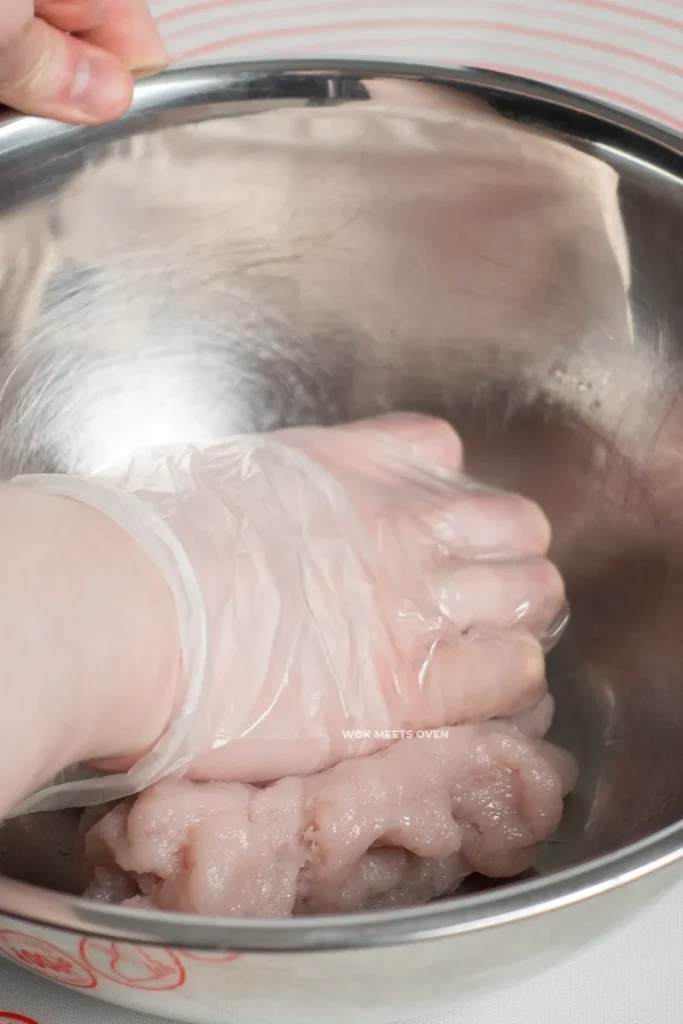
- Not wearing gloves to knead or shape the filling and dough. This will make it difficult to knead and shape the dough and filling as it will be sticky.
- Brushing way too much cooked glutinous rice flour onto mooncakes. If you add too much cooked glutinous rice flour onto the mooncakes then when you mold it, the glutinous rice flour will cover up the mooncake designs.
- Chilling the dough to use for the next day. This will lead to a hard dense dough when you’re ready to use it. It’s best to use the dough shortly after steaming it.
Storage Tips
The snow skin mooncakes can be stored in an airtight container in the fridge for up to 1 week; however, it is recommended to finish eating them all within 3-4 days as the skin will become denser over time.
You can also freeze them for up to a month. Let them thaw in the fridge overnight before consuming.
Other Recipes That Go Well With This
These snow skin moon cakes go well with other snow skin mooncakes like my snow skin mooncake with custard filling recipe. They also pair well with traditional baked mooncakes like lotus seed paste mooncakes with salted egg yolk.
Frequently Asked Questions (FAQs)
Can I Just Use either Glutinous Rice Flour or Rice Flour Instead of Both?
I’m afraid not. You’ll need both for this recipe.
Why Is My Filling Dry and Hard?
You cooked it for too long. It should only be cooked up until the point where it no longer sticks to your spatula and has formed into 1 large piece of filling.
Also, the filling should be cooked on medium to medium-low heat. Never higher or you run the risk of making it too dry.
Why Is My Snow Skin Hard After Storing It in the Fridge?
This will naturally occur once the snow skin has cooled down in the fridge. You can soften it back up by either:
- Reheating the snow skin mooncakes in the microwave for a few seconds
- Leaving it out at room temperature until it softens back up
The Filling Is Too Sticky. How Do I Make It Less Sticky?
You can put the filling in the fridge and let it chill for at least 1 hour. This will make it less sticky. Also, make sure that you’re cooking the filling long enough. It should form into a thick paste. If it’s still runny, then that means you didn’t cook it long enough.
Wear gloves when handling the filling and dough to make it easier to handle.
Can You Freeze Snow Skin Mooncakes?
Yes, you can freeze them for up to a month. Just let the mooncakes thaw before eating.
How Many Mooncakes Can I Make With This Recipe?
12 pieces of 50g each.
What Size Mooncake Molds Should I Use for This Recipe?
You’ll need 50g mooncake molds for this recipe.
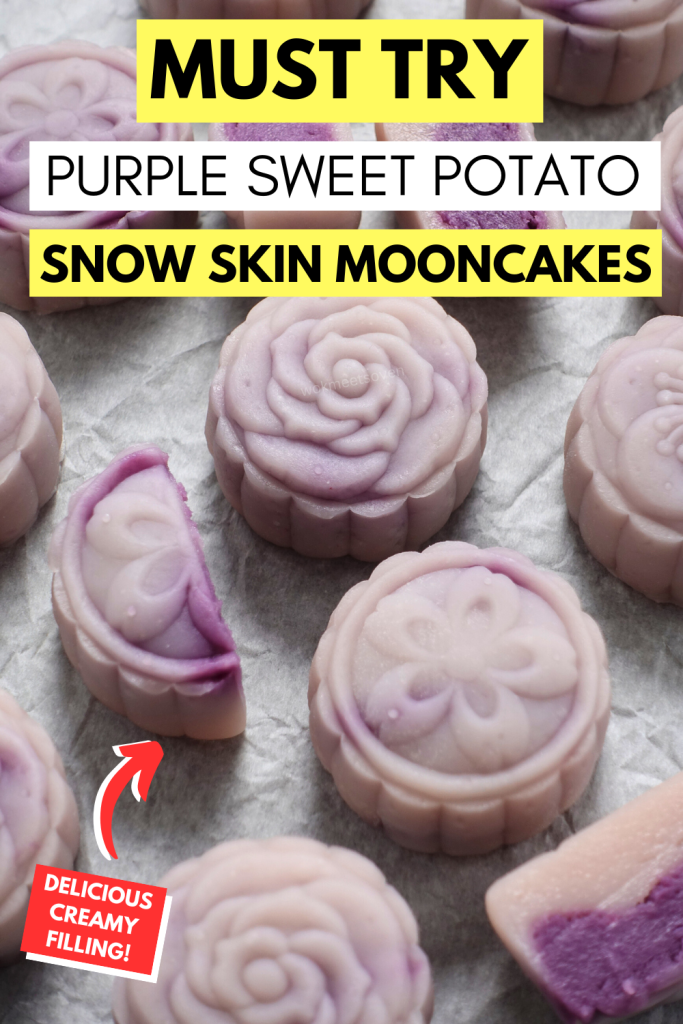
You can pin this image
Purple Sweet Potato Snow Skin Mooncakes
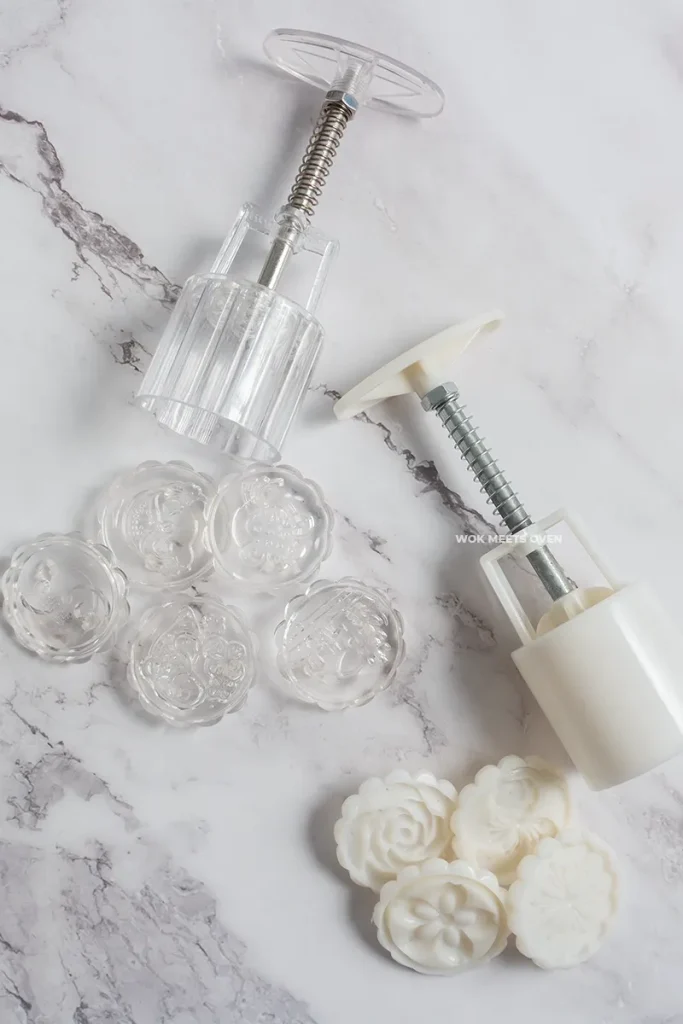
Equipment
- 1 Steamer or Wok
- 1 Moon Cake Mold 50g
Ingredients
Snow Skin
- 40 g Rice Flour
- 40 g Glutinous Rice Flour
- 30 g Wheat Starch
- 130 ml Milk + Purple Sweet Potato Liquid (From Steaming) Combine both to reach 130ml
- 25 g Sweetened Condensed Milk
- 40 g Icing Sugar
- 25 g Vegetable Oil
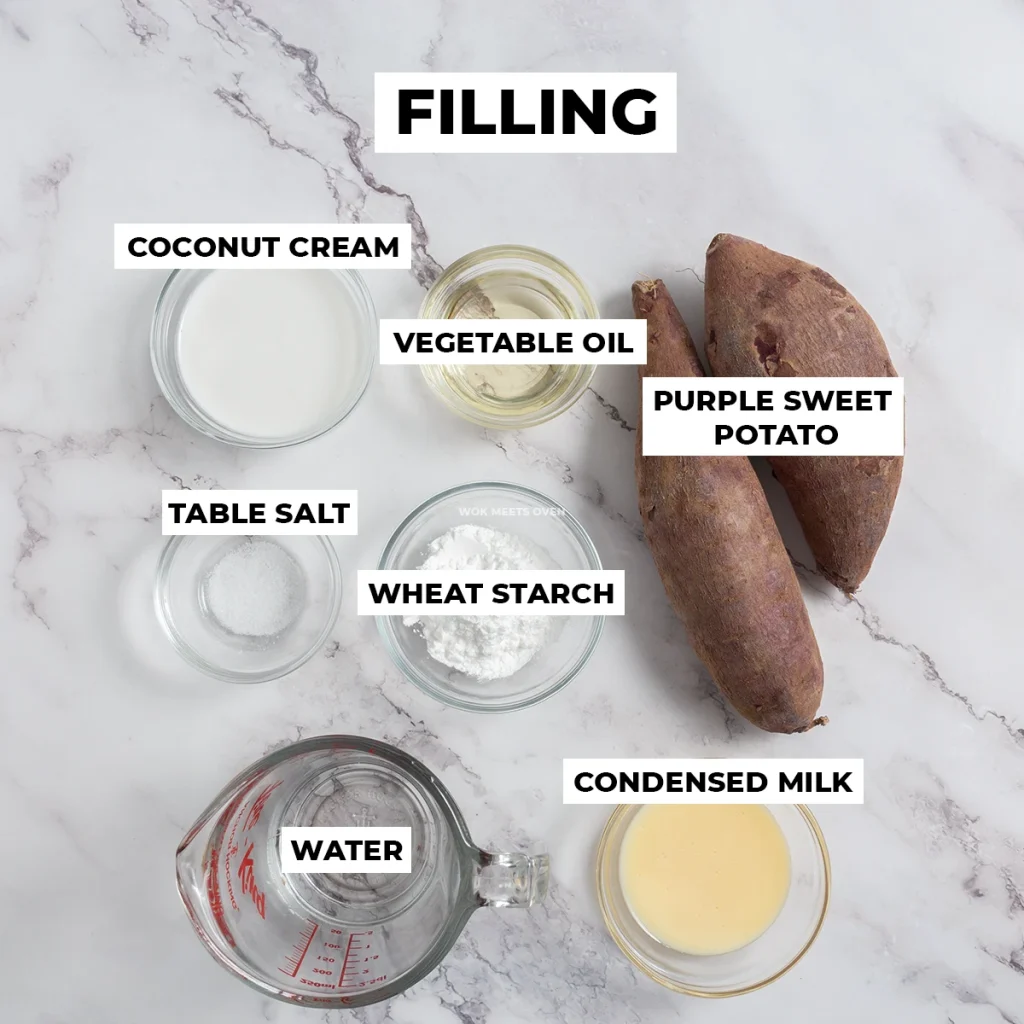
Filling
- 145 g Peeled Purple Sweet Potatoes
- 100 ml Water Added to purple sweet potatoes during steaming
- 60 ml Water Added to purple sweet potatoes when blending
- 17 g Wheat Starch
- 45 g Sweeteneded Condensed Milk
- 25 g Vegetable oil
- 55 g Coconut Cream
- 1/4 Teaspoon Table salt
Instructions
Making the Filling
- Wash and remove the skin from the purple sweet potatoes.
- Cut them into bite-sized pieces and place them into a bowl or plate.
- Add 100ml of water to the purple sweet potatoes and steam them for 11-12 minutes at medium-high heat after the water is boiling. After 11-12 minutes, check and see if they are done by using either a fork or a chopstick and poke the sweet potatoes. You should be able to easily poke a hole through them without much resistance. If they are still hard, then continue steaming them until soft.
- After steaming the sweet potatoes, strain out the liquid but keep the liquid (do not throw it away!). We will use this as a natural food coloring to add a light purplish color to our snow skin dough.
- Place the steamed sweet potatoes inside a blender or food processor. Add in your water, condensed milk, wheat starch, salt, coconut cream, and cooking oil.
- Blend everything together until smooth.
- Now, transfer the filling to a non-stick pan. Cook it on medium heat until you start to see it solidify, then reduce the heat to medium-low and continue cooking.
- Once the filling no longer sticks to the pan or your spatula and has formed into one big piece, remove it from the pan and transfer it to a bowl.
- Let it cool down, then cover it with plastic wrap and place it in the fridge to cool down.
Making the Snow Skin
- In a large bowl, add in your rice flour, glutinous rice flour, wheat starch, icing sugar, and condensed milk. Give a quick whisk.
- Now using a scale, pour out the purple liquid from the sweet potatoes into a bowl and measure out how much liquid you have.
- Next, add milk to the purple liquid until the total weight reaches 130ml.
- Pour this liquid mixture into the large bowl with the other ingredients. Mix everything well together using a whisk.
- Now pour the mixture through a sift onto a pan for steaming. Steam the mixture on medium-high heat for 25 minutes.
- Once done, remove it from the steamer and pour in your cooking oil.
- Now make some cuts to the steamed snow skin and then remove it from the bowl/plate and transfer it to a large mixing bowl.
- Allow the snowskin to cool down for 2-3 minutes before kneading the dough. Knead the dough until it is nice and smooth and all of the oil has been absorbed into the snow skin. Shape it into a ball and cover it with some plastic wrap, and let it rest.
Cooking Glutinous Rice Flour
- Add glutinous rice flour to a saucepan or non-stick pan.
- Stir-fry it on low heat for about 5 minutes or until the color turns into a light beige color, and you can smell an aroma coming from the cooked glutinous rice flour.
- Remove it from the heat and transfer it to a bowl for dusting the mooncakes later.
Assembling the Snow Skin Mooncakes
- Now take out the filling from the fridge and weigh it out.
- Then divide it into 12 pieces (it should be approximately 25g per piece). Do not use more than 25-26g per piece, as it will not fit the mold! If you have any excess, then either make an extra piece with it or consume the extra filling as is.
- Next, roll the filling into balls and then cover them with plastic wrap and place them back in the fridge.
- Now weigh out the snow skin dough and then divide it into 12 pieces. Again, they should be approximately 25g per piece.
- Roll out each piece into a ball and then cover it with plastic wrap.
- Now grab 1 piece of the snowskin and flatten it out into a circle until it is about the size of your palm or about an inch away from the filling when it is placed in the center of the snow skin. You can do this easily by using the palm of your opposite hand and pressing down onto the snow skin and then gently stretching it out with your thumb and index fingers while rotating it with both hands.
- Now grab one piece of your filling and place it in the center of the snow skin dough.
- Then, using your thumb and index finger, hold the filling with one hand and flip it over.
- Now, using your other hand wrap your hand around the sides of the dough and slowly bring the sides toward the center on all sides, making sure not to allow any air pockets to develop.
- Next, flip it over again, and then using your thumb and index finger on one hand with the other hand holding it while rotating, slowly push the snow skin towards the center at the top to cover up all of the filling.
- Once all of the filling has been covered by the snow skin, seal the top by pinching it and then folding it back into the snow skin or ripping off the tip. Roll it out until it becomes smooth and resembles a ball, then cover it with plastic wrap.
- Repeat for all of the other pieces.
- Now grab a brush and then lightly brush the cooked glutinous flour onto the snow skin mooncake. Do not go overboard here; otherwise, the cooked glutinous rice flour will cover up all of your designs.
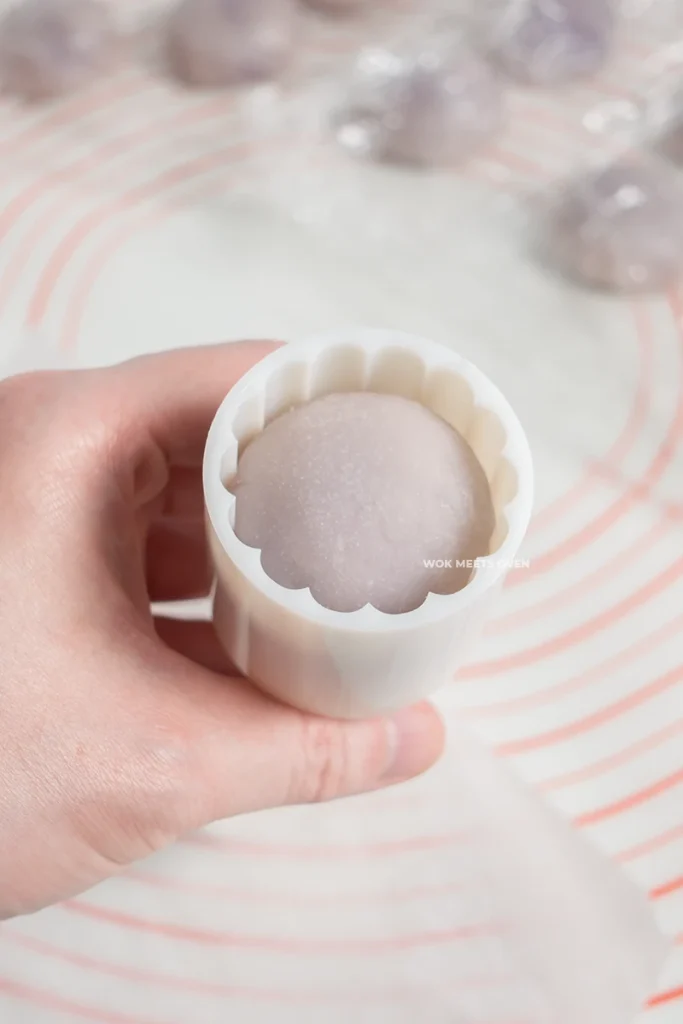
- Next, grab a 50g moon cake mold and place the moon cake inside the moon cake mold with the smooth side facing up. Make sure that the moon cake pieces can easily fit into the mold. If it doesn’t fit, do not force it in. Instead, gently shape it into a smaller piece by lightly pinching it while rotating it.
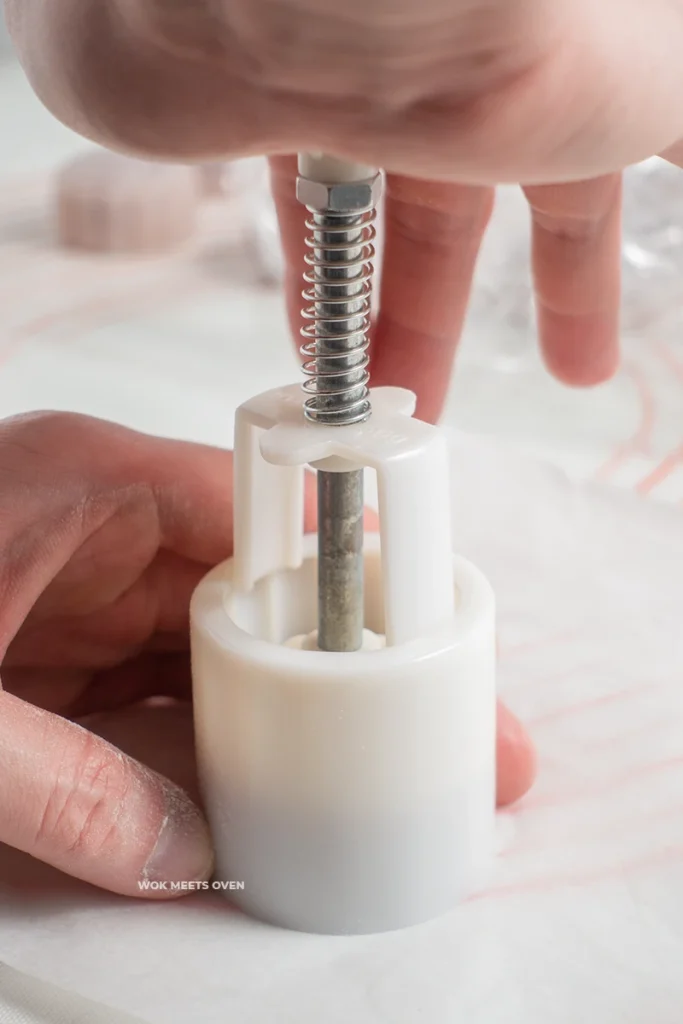
- Now, place a piece of parchment paper underneath the moon cake mold and then press down onto the moon cake mold with one hand while holding the mold with the other hand. Keep pressing down for about 12 seconds and then slowly release the mooncake from the mold. If the moon cake doesn’t come out, then gently press down another 1-2 more times while slightly lifting up the moon cake mold.
- Repeat for all of the other pieces.
- Once done, place all of the snow skin mooncakes in a container with a lid in the fridge and chill them for a minimum of 2 hours before eating.