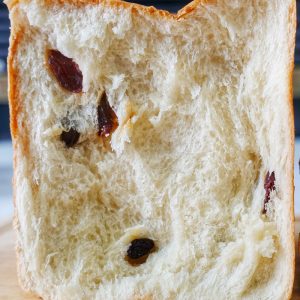
Shokupan Raisin Bread Loaf
Soft, sweet and airy are the defining qualities of the Shokupan raisin bread loaf. This bread loaf is perfect for breakfast, lunch or a snack.
Equipment
- 1 bread mold 450 grams
Ingredients
Tangzhong
- 90 ml water
- 18 grams bread flour
Dough
- 333 grams bread flour
- 32 grams white granulated sugar
- 6 grams salt
- 5 grams instant yeast
- 180 ml milk (lukewarm)
- 20 grams unsalted butter
- 90 grams raisins
Instructions
- In a small sauce pan, add in your water and bread flour and mix everything well together. Heat this mixture over low heat while constantly stirring everything to prevent it from burning and clumping up. Try to break apart any flour bits that you see.
- Continuing stirring the mixture until it becomes a thick paste. This will take you several minutes so don’t rush the process.
- Once the Tangzhong is ready, remove it from the stove, and transfer it to a small bowl or dish. Cover it with plastic wrap, making sure to press down on the plastic wrap so that it touches and engulfs the Tanzhong to prevent it from drying.
- Chill the Tangzhong in your fridge for at least 20-30 minutes or likewise you can make the Tangzhong overnight and use it the next day as well.
- Once the Tangzhong has cooled down, we can start making our dough.
- To prepare our dough, in a large mixing bowl add in your bread flour, sugar, salt, instant yeast, the cooled Tangzhong from earlier, and then turn on your stand mixer. while the dough is mixing, slowly add in your milk as well.
- Let the dough knead for 3-4 minutes then add in your butter to the dough.
- Continue mixing for another 8-9 minutes until the dough becomes smooth.
- To check and see if the dough is done mixing, you can apply the window pane test.
- Take a piece of the dough, and stretch it until it become somewhat translucent and light can pass through.
- If the dough, doesn’t tear while you’re stretching it to this point then the dough has been sufficiently kneaded.
- If it tears, you will need to continue kneading the dough.
- Once done mixing, transfer the dough to a large greased bowl, shape it into a ball either using your hands or a spatula then cover it with plastic wrap or a towel and let it proof in a warm place until double in size, about an hour or so.
- While the dough is proofing we can get our raisins ready.
- In a bowl, soak your raisins in hot water for 5-10 minutes then drain it and let the raisins dry off.
- Once our dough is done proofing, de-gase the dough by punching down on it and then transfer it to a floured countertop.
- Shape the dough roughly into a round ball, then flatten it with your hands.
- Next, using a dough roller, roughly roll out the dough until it’s about 8-10″ wide.
- Now take a handful of raisins and slowly add in your raisins but don’t use up everything. We will be adding in our raisins multiple times to our dough to ensure even distribution.
- Once done, roll the dough from one end to the other then shape the dough roughly into a ball.
- Now weigh the dough on a scale and then divide it into 2 pieces.
- Shape each piece into a ball once more and weigh out each piece to ensure they are of equal size.
- Then cover both pieces of dough with plastic wrap or a towel and let it rest for 10-15 minutes to relax the dough.
- Once 10-15 minutes have passed, take each piece of the dough, flatten it and roll it out again until the dough is roughly 13-14″ wide.
- Add in some raisins to the dough, then grab one end of the dough and fold it inwards towards the center like a book, now grab the other end and fold it over the previous fold so that you end up with a rectangle.
- Now flip the dough over, apply some flour to the dough and your roller and roll out the dough again like before.
- Add some raisins, then slowly roll the dough from one end to the other so that it resembles a log.
- Pinch the ends to seal the dough.
- Repeat the steps for the other piece of dough.
- Now grease a bread mold.
- Place each piece inside of the bread mold and then cover it and let it proof one last time in a warm place until the dough is about 1 cm below the top of the bread mold. This will take about 50 minutes to 1 hour depending on your environment.
- Once you notice that the dough is about 4-5 cm below the top of the bread mold, it’s a good idea to start pre-heating your oven.
- Pre-heat your oven at 400°F (200°C).
- Once the dough is about 1 cm below the top of the bread mold, insert the lid into the bread mold and bake the bread at 400°F (200°C) for about 40-45 minutes.
- Once done baking, remove the lid immediately, and bang on the sides of the bread mold to loosen up the bread and then remove the bread from the bread mold.
Video
Notes
This is a sticky dough and it is recommended to use a stand mixer to knead the dough.
If you leave the bread inside of the bread mold for too long, condensation will build up and the bread will stay crispy on the outside.