Pork Floss Buns
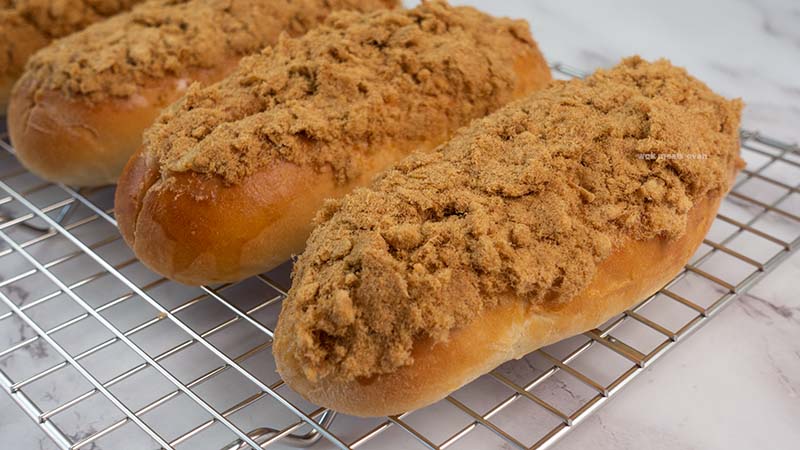
These pork floss buns are super soft and fluffy and loaded with pork floss and a creamy sweet and tangy sauce. You won’t need to go out to a Chinese bakery to buy pork floss buns ever again after trying this recipe!
What are pork floss buns?
Pork floss buns, also known as pork sung buns, meat floss bread, or rou song bao in mandarin, are a popular Chinese bun that consists of a soft, sweet and fluffy milk bread that is filled with sweet and savory pork floss filling. There are several variations of the pork sung bun including ones that are topped with mayonnaise and scallions that bring a different flavour profile to the classic pork floss bun. Pork floss originated in China and has been used in a variety of different cuisines such as Chinese and Vietnamese dishes like congee. The pork floss is created by shredding dried pork into fine strands and seasoning it with a variety of different Asian seasonings such as soy sauce and sugar, giving it an intensely savory umami flavour profile that will satisfy anyone’s taste buds. You will typically find pork floss being sold at Asian grocery stores or being used as a topping in many dishes and baked goods at Asian restaurants and bakeries all around the world.
The pillowy soft and airy milk buns combined with the sweet and savory, slightly crispy pork floss creates an interesting contrast of different textures. This fine balance ultimately produces an exceptionally yummy bread that critics can’t stop raving about. Chinese pork floss rolls is always something I try to get everytime I stop by a Chinese bakery.
Now if you don’t live near a Chinese bakery, don’t worry. I’ve got your back 😉
I’ve re-created the classic Chinese pork floss bun recipe from scratch and it tastes just as good as the ones that you’ll find at the local Chinese bakery shops, except yours will be coming hot and fresh out of the oven.
Here’s how to make my Chinese pork floss bread recipe:
Ingredients
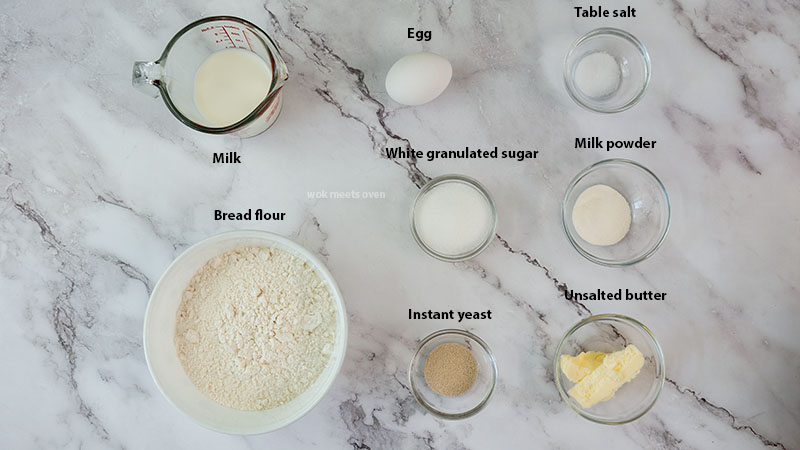
Tangzhong:
- Water 100 ml
- Bread flour 20 g
Dough:
- Bread flour 300 g
- Milk 110 ml
- 1 Large Egg
- Instant yeast 5 g
- Unsalted butter 20 g
- White granulated sugar 40 g
- Table salt 1/4 tsp
- Milk powder 6 g
Pork floss filling:
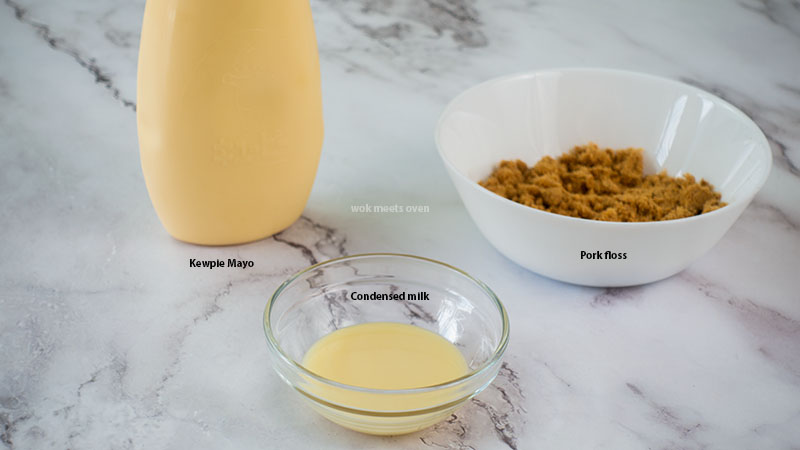
- Pork floss 120-150g
- Kewpie mayo 3-4 Tbsp
- Condensed milk 1 Tbsp
Ingredient notes
With pork floss, you’ll typically find 2 varieties, either a crispy version or a soft version. There is even another version that includes dried seeweed as well. For this recipe, you can opt for whichever one that you prefer.
I’m using kewpie mayo instead of regular mayo as it has a slightly sweeter and milder taste that isn’t overwhelming when combined with the pork floss and milk bread.
The condensed milk adds a little creamy sweetness as well to the mayo when mixed in.
Substitutions
For those of you that are lactose intolerant, you can substitute cow’s milk with a plant-based milk or even water.
You can also use all-purpose-flour as a substitute for bread flour if you don’t have bread flour available to you, however due note that you’re bread texture will not be the same and will not give you that nice chewiness compared to using bread flour.
If you can’t eat pork or it’s not available, a good substitute would be chicken floss which has a similar texture as pork floss.
How to make it
Tangzhong
We’re going to start off by making our Tangzhong, a water roux. This will make our bread nice and fluffy when baking.
In a small sauce pan, add in your bread flour and water. Heat the pan on low heat while constantly stirring it until the mixture turns into a thick gelatinous paste.
Then remove the pan from the stove and transfer it to a small bowl or dish. Cover it with plastic wrap and then store in the fridge and let it cool down for at least 30 minutes before using.
You can also make your Tangzhong the night before as well.
Dough
After our tangzhong has cooled down, we’re going to make our dough.
In a stand mixer mixing bowl, we’re going to add in our bread flour, white granulated sugar, table salt, instant yeast, milk powder, an egg at room temperature, + our tangzhong from earlier.
Put the mixing bowl onto the stand mixer and give it a quick few whisks then slowly add in your room temperature milk to the dough.
Now continue kneading the dough for 3-4 minutes then add in your room temperature butter.
Continue mixing it for an additional 9-10 minutes.
To check and see whether or not your dough has been sufficiently kneaded, grab a small piece of the dough and stretch it out with your fingers until it becomes somewhat translucent and you can see light passing through it.
If you do not see any rips or tears or very little, then your dough has been sufficiently kneaded.
Now transfer the dough to a greased large bowl.
Apply a little bit of oil to your hands and then shape the dough into a round ball.
Place it back into the bowl and cover it with plastic wrap or a towel and let it proof in a warm place until double in size, approximately 1 hour.
Once our dough has finished proofing, de-gase the dough and transfer it to a floured countertop.
Flatten the dough and then weigh it out on a scale.
Now divide it into 8 pieces and weigh out each piece so that you get equal portions.
Next, shape each piece into a round ball.
Once done, cover the dough with plastic wrap or a towel and let it rest for 15 minutes to relax the dough.
Once 15 minutes has passed, grab one piece of the dough and flatten it out. Now roll the dough out into an oval shape.
Then slowly roll the dough from one end to the other.
Now turn the dough over and pinch the ends of the dough to seal it.
Repeat this process for all of the other pieces.
Once done, place the buns onto a baking tray lined with parchment paper and cover the buns with plastic wrap or a towel and let it proof in a warm place for about 40 minutes.
While the buns are proofing, prepare an egg wash by whisking 1 egg together with a splash of milk.
Once done, set the egg wash aside and preheat your oven to 350°F (180°C).
Once the buns are finished proofing, apply the egg wash to the top of the buns.
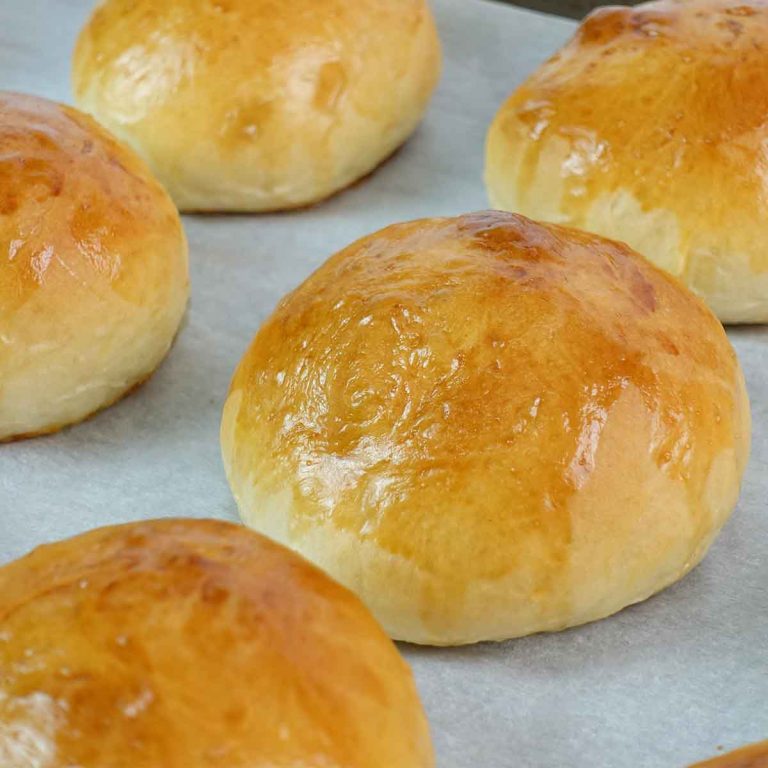
Now bake the buns for 15-16 minutes at 350°F (180°C) or until the top of the buns is golden brown.
Kewpie Mayo sauce
While the buns are baking, prepare the kewpie mayo sauce.
In a bowl, add in your kewpie mayo and condensed milk. Mix everything well together and set it aside.
Once the buns have been baked, let it them rest on the baking tray for 5-10 minutes then transfer them to a cooling rack and let them cool down before cutting into them. This will make cutting the buns a lot easier.
Once the buns have cooled down, we’re going to make a long cut across the bun about halfway through the bun. Do not cut the bun in half!
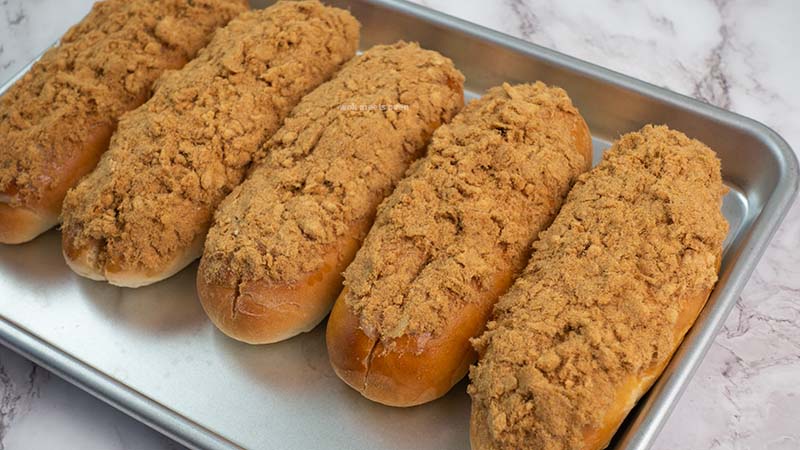
Now apply a generous amount of the kewpie mayo sauce that we made on the inside of the bun as well as on the top of the bun.
Next, we’re going to add the pork floss to the bun.
Now you can either sprinkle in the pork floss or you can dip it in.
Either way, make sure that you put a generous amount of the pork floss onto the buns.
Tips
Do not cut into the freshly baked buns, as this will not only make cutting the buns more difficult, but it may also ruin the shape of the buns as well. Allow the buns to cool down first (at least 30min to 1 hour).
F.A.Q.S
Can I use dry active yeast instead of instant yeast?
Yes, absolutely! If you’re using dry active yeast make sure that you proof the yeast in a warm liquid such as water or milk in our case along with some sugar. You should see the yeast foam up at the top and produce a very yeast like smell. If you see this, that means your yeast is good to use.
How long can I store the buns for?
You can store the buns in the fridge for up to 5 days or in the freezer for up to 3 months. Make sure that you reheat the buns either in a microwave or the oven if you stored them in the fridge or freezer to give them back their nice soft texture.
How come my dough is not rising?
There could be a number of reasons such as the following:
- Your yeast is dead. Check if your yeast is still alive by adding 1 tsp of yeast, along with 1 tsp of sugar in 1/2 cup of warm water, give it a good mix, then let it sit for 10-15 minutes. If it starts to foam at the top with a very yeasty smell then your yeast is still alive.
- Your environment is too cold. Yeast rises best in a warm environment
- You mixed in hot water with the yeast and killed it.
- You didn’t knead the dough sufficiently enough. Use the window-pane test to check if your dough has kneaded properly.
I’m lactose Intolerant, can I substitute cow’s milk with something else?
Yes, you can use either water, or some sort of nut milk such as almond milk.
I don’t own a stand mixer, can I hand knead the dough?
Yes, you can, however do realize that the dough is sticky and will be more difficult to knead by hand, that is why it is strongly recommended that you use a stand mixer to make life easier for you . Furthermore, you may need to spend a little more time to knead it compared to using a stand mixer, however it is definitely possible to hand knead it.
Other bread recipes you’ll love
- Chinese Tuna Buns
- Hong Kong Spam and Egg Bun
- Chinese Pineapple Buns (Bolo Bao) Recipe
- Chinese Ham and Cheese Buns
- Chinese Hot Dog Buns Recipe
You can pin this image

Pork Floss Buns
Equipment
- 1 stand mixer
Ingredients
Tangzhong
- 100 ml Water
- 20 g Bread flour
Dough
- 300 g Bread flour
- 110 ml Milk
- 1 Large Egg
- 5 g Instant yeast
- 20 g Unsalted butter
- 40 g White granulated sugar
- 1/4 tsp Table salt
- 6 g Milk powder
Pork Floss Filling
- 120-150 g Pork floss
- 3-4 Tbsp Kewpie mayo
- 1 Tbsp Condensed milk
Instructions
Tangzhong
- In a small sauce pan, add in your bread flour and water. Heat the pan on low heat while constantly stirring it until the mixture turns into a thick gelatinous paste.
- Then remove the pan from the stove and transfer it to a small bowl or dish. Cover it with plastic wrap and then store in the fridge and let it cool down for at least 30 minutes before using.
- You can also make your Tangzhong the night before as well.
Dough
- In a stand mixer mixing bowl, we’re going to add in our bread flour, white granulated sugar, table salt, instant yeast, milk powder, an egg at room temperature, + our tangzhong from earlier.
- Put the mixing bowl onto the stand mixer and give it a quick few whisks then slowly add in your room temperature milk to the dough.
- Now continue kneading the dough for 3-4 minutes then add in your room temperature butter.
- Continue mixing it for an additional 9-10 minutes.
- To check and see whether or not your dough has been sufficiently kneaded, grab a small piece of the dough and stretch it out with your fingers until it becomes somewhat translucent and you can see light passing through it.
- If you do not see any rips or tears or very little, then your dough has been sufficiently kneaded.
- Now transfer the dough to a greased large bowl.
- Apply a little bit of oil to your hands and then shape the dough into a round ball.
- Place it back into the bowl and cover it with plastic wrap or a towel and let it proof in a warm place until double in size, approximately 1 hour.
- Once our dough has finished proofing, de-gase the dough and transfer it to a floured countertop.
- Flatten the dough and then weigh it out on a scale.
- Now divide it into 8 pieces and weigh out each piece so that you get equal portions.
- Next, shape each piece into a round ball.
- Once done, cover the dough with plastic wrap or a towel and let it rest for 15 minutes to relax the dough.
- Once 15 minutes has passed, grab one piece of the dough and flatten it out. Now roll the dough out into an oval shape.
- Then slowly roll the dough from one end to the other.
- Now turn the dough over and pinch the ends of the dough to seal it.
- Repeat this process for all of the other pieces.
- Once done, place the buns onto a baking tray lined with parchment paper and cover the buns with plastic wrap or a towel and let it proof in a warm place for about 40 minutes.
- While the buns are proofing, prepare an egg wash by whisking 1 egg together with a splash of milk.
- Once done, set the egg wash aside and preheat your oven to 350°F (180°C).
- Once the buns are finished proofing, apply the egg wash to the top of the buns.
- Now bake the buns for 15-16 minutes at 350°F (180°C) or until the top of the buns is golden brown.
Kewpie Mayo Sauce
- While the buns are baking, prepare the kewpie mayo sauce.
- In a bowl, add in your kewpie mayo and condensed milk. Mix everything well together and set it aside.
- Once the buns have been baked, let it them rest on the baking tray for 5-10 minutes then transfer them to a cooling rack and let them cool down before cutting into them. This will make cutting the buns a lot easier.
- Once the buns have cooled down, we’re going to make a long cut across the bun about halfway through the bun. Do not cut the bun in half!
- Now apply a generous amount of the kewpie mayo sauce that we made on the inside of the bun as well as on the top of the bun.
- Next, we’re going to add the pork floss to the bun.
- Now you can either sprinkle in the pork floss or you can dip it in.
- Either way, make sure that you put a generous amount of the pork floss onto the buns.

