Chinese Coconut Pudding
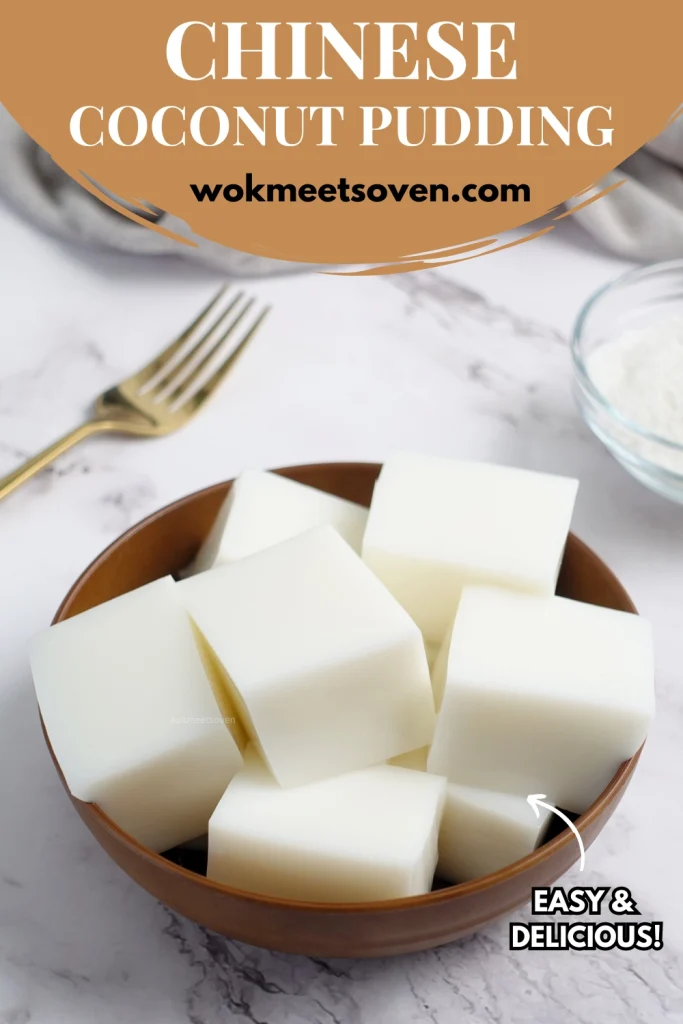
This refreshing Chinese coconut pudding dessert is out of this world delicious! Rich and creamy, full of coconut flavour, yet only requires 5 simple ingredients to make!

Introduction
Coconut lovers rejoice, your call has been answered. Introducing the ever-so-famous Chinese coconut pudding dessert that you typically find being sold at Chinese dim sum restaurants during tea time (yum-cha).
Yup, there’s no longer a need to wake up extra early on a weekend and drive all the way downtown trying to find parking, and then wait 30+ minutes for a table at a dim sum restaurant while being tempted by the smell of all that fabulous and delicious food while your stomach growls like crazy.
What is Coconut pudding?
Chinese coconut pudding or Hong Kong coconut pudding otherwise known as 椰汁糕 in Chinese is basically Chinese coconut jelly made using gelatin and mixed with coconut milk and sugar. While the Hong Kong-style coconut pudding may seem simplistic due to its minimal basic ingredients, the Chinese coconut milk dessert is actually rather tasty, hence why it’s a popular item at a lot of dim sum restaurants.
Now in addition to finding Chinese coconut jelly during tea time, you’ll also find its close cousins, the world-famous Chinese mango pudding and almond pudding. The mango and almond pudding is often times served with condensed milk poured on top of it, making it even creamier. I’m personally a huge fan of Chinese almond pudding and will be sharing my Chinese almond pudding dessert recipe sometime in the near future on the site, so stay tuned!
Is Coconut Jelly Good for You?
If you’re health conscious like me (oh who am I kidding, I have a difficult time around tasty food 😫), then you might be wondering is coconut jelly bad for you?
Well the truth of the matter is due to all of the fat that is present in a can of coconut milk, we’re talking nearly a thousand calories per a 400ml can of coconut milk, it’s most likely not that good for you to consume if you’re trying to lose weight, especially once you’ve added in the white granulated sugar as well to the recipe.
However, with that being said, consuming Chinese coconut milk pudding in moderation should be ok, just don’t consume the whole dish in one sitting 🤣.
Which Type of Coconut Milk Should You Use?
Let’s talk about this for a moment:
I found through experimentation that if you choose to use a “regular” type of coconut milk, it tends to be much creamier (obviously 🙄), but this will cause all of the fat to pool to one side of the coconut jelly after it has solidified. You’ll notice a section of the coconut pudding that is pure white once you take it out of the fridge.

You can even see this happening if you don’t shake the can well and mix the coconut milk after opening the can of coconut milk if you don’t live in a hot humid environment. All of the solid coconut fat will be present at the top of the can. Now you may or may not like this depending on your personal preference. If you don’t care about appearances as much but prefer a creamier texture then I suggest you use regular coconut milk.

Now on the other hand, if you opt to use coconut milk that was designed for making desserts or is more runny, then you probably won’t encounter the issue with the coconut milk pooling to one side after it has cooled down or will see very little of it happening. You also won’t need to mix it/shake it as vigorously when pouring it out of the can compared to regular coconut milk. It’ll just be in liquid form when you pour it out vs regular coconut milk which still has solid chunks in the can. I found using this type of coconut milk produces a more even-coloured coconut jelly after it has cooled down.


One last thing to note, do not confuse coconut milk with coconut cream! This recipe calls for coconut milk, not cream. Coconut cream has a much higher fat content and is much thicker compared to coconut milk. You will end up with a much thicker pudding if you use coconut cream unless the coconut cream has been diluted. I do not recommend substituting coconut milk with coconut cream!
Ingredients
Coconut milk 400ml
Milk 300ml (can use any kind: skim, 1%, 2%, whole)
Water 250ml (already boiled and cooled down, basically ready to drink)
White granulated sugar 135g
Gelatin 25g

Ingredient Notes
Coconut milk: Make sure to use coconut milk that does not have added sugar otherwise you may find the coconut jelly a bit too sweet.
Milk: You can use any kind of cow’s milk for this recipe. It shouldn’t make too much of a difference in the final product.
Substitutions
- Gelatin: You can substitute gelatin with agar powder. If you’re using agar powder make sure that you follow the instructions on the package as I have encountered different instructions from different brands. Note that this recipe was made with gelatin in mind and not agar powder. This means that if you decide to use agar jelly as a substitute for gelatin, the flavour and sweetness will be impacted as agar powder tends to require more water/liquid vs gelatin. You’ll most likely end up with a more bland version of my recipe unless you up some of the other ingredients such as coconut milk, sugar, etc. I may post an agar version of this coconut pudding recipe in the future but for now, this recipe is using gelatin exclusively.
- White granulated sugar: you may opt for some artificial sweeteners if you prefer not to use sugar. I do not recommend substituting brown sugar for white granulated sugar as you want to keep the white appearance of the coconut jelly. I also do not recommend using other sweeteners such as honey or maple syrup as those have a very distinct taste to them which will affect the overall taste of the coconut pudding.
How to Make Chinese Coconut Pudding
This Chinese coconut jelly recipe is super simple to make and only requires 5 ingredients! It also doesn’t require more than 15 minutes to make either, although you will need to let it cool down and solidify before you can eat it. Here’s my Chinese coconut pudding dim sum recipe:
Directions
- Start by grabbing your container and adding a few drops of oil to it. Then, grab a brush and brush the oil evenly throughout the container. The reason why we do this is to make it easier to remove the coconut pudding after it has cooled down. Once done, set the container aside.

- Next in a medium sized sauce pan, add in your gelatin and water. Mix everything well together.

- Then add in your milk while stirring the saucepan. Once the milk has been mixed well into the mixture, it’s time to add in your coconut milk.

- Prior to adding in the coconut milk, it’s important to shake the can so that all of the fat content that has pooled at the top of the can can be mixed with the liquid at the bottom of the can. This will ensure that your coconut milk is more evenly mixed when you pour it out, not to mention making it easier for you to pour it out of the can instead of having solid chunks drop into the saucepan and splashing the liquid everywhere, making a mess in your kitchen. Don’t ask me how I know this 🤦♂️
- Add in your coconut milk now while stirring the saucepan.

- Once everything has been evenly mixed, add in your white granulated sugar to the saucepan while stirring it as well.

- Finally, turn on your stove to low to medium-low heat while constantly stirring the pot.
- Our goal here is not to heat up the saucepan but rather to just heat the saucepan enough that we can fully dissolve all of the sugar and gelatin.
- You can check when the sugar and gelatin has been fully dissolved by scooping up the liquid using a spoon and examining it to see if there are any gelatin bits left.


- Once you no longer see any gelatin specks left in the liquid, turn off the stove and remove the saucepan from the stove.
- Now using a sieve, pour the mixture over your container that you oiled earlier.

- Now, using a spoon, scoop out all of the bubbles that you see to make the coconut pudding look nice. This step is optional, though.

- For the little bubbles that you see in the corners that are hard to reach, you can use a toothpick instead to pop the bubbles.
- Finally, cover the container with a lid and let it cool down in the fridge for at least 5-6 hours or ideally overnight. Yeah, I know it’s hard to resist, but trust me, you’ll want to wait it out 😂
- Once the coconut pudding has cooled down, remove it from the fridge.
- Now you have 2 choices: you can either cut the coconut jelly into pieces inside of the container (makes the cuts look nicer) or you can just take the whole coconut jelly out of the container and lay it on a cutting board and cut it that way.
- If you choose to use the second option, then gently press down onto all sides of the coconut jelly to make it easier to remove it.
- Now, place your cutting board on top of the container and flip the container over.


- The coconut jelly should naturally come off of the container, but if it does not, then gently push up on the sides of the jelly and also shake the container, and it’ll fall out.

- Now slice the coconut jelly into cubes or whatever desired shape you prefer and serve.


Tips
- Use your spoon and scoop up some of the liquid to see if there are still any undissolved gelatin present. If there isn’t any, then you can remove the saucepan from the stove and pour it out.
- To get a more even cut of the coconut jelly, you can opt to slice the coconut pudding into pieces inside of the container instead of taking it out first.
- Depending on your personal preference, you can choose to use a coconut milk that was designed for making desserts or is more runny and not as thick as the regular version. What this does is it ensures that your finished coconut pudding is evenly white throughout the jelly instead of having all of the coconut fat pool in one part of the coconut jelly, leading to different coloured parts. However, a more “fatty” type of coconut milk will produce a more creamier texture.
Common Mistakes Beginners Make
- You ended up with a thick and lumpy coconut jelly texture because you substituted gelatin with agar powder without taking into account the different liquid ratio and method of making the agar powder. This happened to me the first 2 or so times I tried to make this recipe 🤦♂️ This recipe has been designed for gelatin use exclusively and not agar powder
- You removed the mixture before the gelatin has fully dissolved leading to tiny gelatin bits and pieces in the final HK coconut pudding. Make sure that you check and see whether or not the gelatin has fully dissolved before removing it from the stove by taking a spoon and scooping the mixture to see if all of the gelatin has fully dissolved.
- Your coconut jelly does not solidify and remains runny because you failed to put it in the fridge and allow it time to cool down. Just be patient!
- You mixture is very thick and overly white because you used coconut cream instead of coconut milk. Stick to coconut milk!
Storage Tips
After you’ve made this Asian gelatin coconut dessert but noticed that you still had a lot of leftovers, you might be wondering how long does coconut pudding last?
Well, the good news is that the coconut pudding can be stored in the fridge for up to 1 week.
The bad news is most likely you won’t have enough coconut pudding to last you for the week. In my household, the coconut dessert only lasts 2 days maximum before it’s all gone.
Frequently Asked Questions (F.A.Q.S)
What Size Container Should I Use?
I’m using a container that is 8.5 inches wide on both ends and about 2 inches high in the pictures, however, you can use any container just as long as you can fill it up.
Is This Dessert Vegetarian Friendly?
No! Gelatin comes from animal products. You can opt for using agar powder instead if you want a more vegetarian-friendly version of this recipe, however, note that the method and liquid ratio amounts will be different. Also you’ll need to substitute the cow’s milk with a plant-based milk such as almond or oat milk. This will most likely affect the taste of the dessert as well.
How Do I Cut My Coconut Jelly Nice and Straight?
I recommend cutting the coconut jelly inside of the container while it’s all compact and not moving. Once you take it out of the container, the jelly tends to move around when you slice into it. I made this mistake the first few times I made the dessert.
Can I Add in Fruit or Other Solid Objects to the Coconut Pudding?
Yes you can! Make sure you add it to the coconut jelly while it’s still in liquid form prior to putting it in your fridge. You may also want to use a container that is smaller but higher, that way the fruit does not stick out of the coconut jelly after it has solidified.
Other Recipes You’ll Love
- Milo Coconut Jelly
- Chrysanthemum Jelly Dessert
- Vietnamese Coconut Pandan Jelly Dessert
- Grass Jelly Dessert
- Chinese Steamed Egg Pudding Dessert
You can pin this image
Chinese coconut pudding
Equipment
- 1 Medium-sized sauce pan
Ingredients
- 400 ml Coconut milk
- 300 ml Milk Any kind of cow's milk (skim, 1%, 2%, whole milk)
- 250 ml Water Cooled down and ready to drink (eg. boiled or filtered)
- 135 g White granulated sugar
- 25 g Gelatin
Instructions
- Start by grabbing your container and adding a few drops of oil to it. Then grab a brush and brush the oil evenly throughout the container. The reason why we do this is to make it easier to remove the coconut pudding after it has cooled down. Once done set the container aside.
- Next in a medium sized sauce pan, add in your gelatin and water. Mix everything well together.
- Then add in your milk while stirring the sauce pan. Once the milk has been mixed well into the mixture, it’s time to add in your coconut milk.
- Prior to adding in the coconut milk, its important to shake the can so that all of the fat content that has pooled at the top of the can can be mixed with the liquid at the bottom of the can. This will ensure that your coconut milk is more evenly mixed when you pour it out, not to mention making it easier for you to pour it out of the can, instead of having solid chunks drop into the saucepan and splashing the liquid everywhere making a mess in your kitchen.
- Add in your coconut milk now while stirring the sauce pan.
- Once everything has been evenly mixed, add in your white granulated sugar to the sauce pan while stirring it as well.
- Finally turn on your stove to low to medium-low heat while constantly stirring the pot.
- Our goal here is not to heat up the sauce pan but rather to just heat the sauce pan enough that we can fully dissolve all of the sugar and gelatin.
- You can check when the sugar and gelatin has been fully dissolved by scooping up the liquid using a spoon and examining it to see if there are any gelatin bits left.
- Once you no longer see any gelatin specks left in the liquid, turn off the stove and remove the saucepan from the stove.
- Now using a sieve, pour the mixture over your container that you oiled earlier.
- Now using a spoon, scoop out all of the bubbles that you see to make the coconut pudding look nice. This step is optional though.
- For the little bubbles that you see in the corners that are hard to reach, you can use a toothpick instead to pop the bubbles.
- Finally cover the container with a lid and let it cool down in the fridge for at least 5-6 hours or ideally overnight.
- Once the coconut pudding has cooled down, remove it from the fridge.
- Now you have 2 choices: you can either cut the coconut jelly into pieces inside of the container (makes the cuts look nicer) or you can just take the whole coconut jelly out of the container and lay it on a cutting board and cut it that way.
- If you choose to use the second option, then gently press down onto all sides of the coconut jelly to make it easier to remove it.
- Now place your cutting board on top of the container and flip the container over.
- The coconut jelly should naturally come off the container, but if it does not, then gently push up on the sides of the jelly, and also shake the container, and it’ll fall out.
- Now slice the coconut jelly into cubes or whatever desired shape that you prefer and serve.


